Before starting the strip and with caliper removed I tested the bearings and rotational resistance. The bearings seemed fine and turned smoothly without noise. I measured the rotational resistance using a spring balance- the hub rotated at well less than 10g of force.
***
 |
| First step is to remove the caliper- this pic taken before just to show the caliper and metal hub end cap. The metal cap is the primary exterior oil seal so its a really tight fit. |
 |
| I found that I couldn't get a screwdriver blade in to dislodge it, but it moved easily enough using a old screwdriver ground to a point that would fit between hub and the metal cap. |
 |
| Cap off- castellated cap nut visible |
 |
| Close up of the way the split pin is bent |
 |
| Remove the pin and the castellated cap just lifts off. To my surprise the nut below was only hand tight and unscrewed easily. There is a tab washer beneath which has to be removed and then the hub just pulled off with hand pressure |
I had a hub puller on order but it wasn't needed. The Hub did bind on the stub axle put was pulled off fairly easily with firm hand pressure. I think this locking onto the stub is probably a sign of wear in the bearing cage (see on) but its also possible that this firm pull actually did some damage? Surely wheel bearings cant be that fragile...?
 |
| Brake back plate dust shield on stub axle. The brake plate is retained by two fastening- an upper bolt from behind... |
 |
| Bolt removed- its locating hole is visible in the back plate and the spigot/spcaer into which it screws is behind the plate in this view. |
 |
| Brake dust shield back plate from behind. Note bracket which fastens behind to a bolt in the vertical linksteering arm. Note the spigot/spacer that the small bolt screws into (top). This has to locate into a hole in the vertical link side arm... I had problems because I didn't check this when refitting (see on) |
 |
| This bolt passes through the back plate bracket which is then held on by a nyloc nut on this stud. Once the back plate was off I could see that there is quite a lot of grease on the vertical link- possibly therefore the seal has been failing and I should renew this. |
 |
| Lower ball joint looks OK and the rubber is intact |
 |
| On this side the upper ball joint also looks undamaged but if I am changing one side, then I will change both. |
 |
| Rear of hub/disc assembly, oil seal centre- all very dirty and I think I got quite a lot of grit in the hub grease as I took it apart. I think if doing this again I would make cleaning the hub an essential step before trying to dismantle anything. The four bolt heads here fix the disc onto the hub. |
 |
| It was hard to unscrew these bolts with a spanner as I could get no purchase on them. I couldn't find a way of holding the hub/disc part securely enough, so I used an electric impact wrench which shifted all four easily. |
 |
| The disc remained stuck fast on the hub so I supported the disc on wooden blocks, hub downwards. |
 |
| I could then fit a punch through the cut outs in the disc to contact the back of the wheel studs beneath. A few taps and... |
 |
The hub dropped out of the disc- again its very dirty. I couldn't find any problem with the bearing but I think I will have to clean it out completely and re-grease to make sure it continues to last.
|
The bearings seemed to be fine but the oils seal was dodgy and as I may have got grit into the hub during disassembly its probably as well to change them anyway. The bearings are sets 2 and 6 consisting of parts LM67048/LM67010 and LM11949/LM11910. I bought the Koyo-made bearings. The oil seal is nitrile 48x62x8 (metric) or 2.445 x 1.89 x 0.315 (imperial). Its available as double (R23) or single lip seals (R21) both with garter spring. I went for single but this will lead to a tighter bearing when setting preload than a double lip which would drag more itself.
 |
| Disc cleaned up nicely in DeoxC overnight followed by a brass wire polish |
 |
| Similarly the dust shield came out well... |
 |
| And was painted in Aldi metal protection paint. |
I then set about dismantling the hub to clean out the bearings. Removing the oil seal is done by putting a wooden block on the disc and levering against it- in my case of course the disc was already off. It was a bit more awkward but it came out in the end. When you lever the seal out like this make sure your lever is engaged with the underside of the seal and not the top of the bearing.
 |
| Using a block and a lever to pry out the seal- you will need all three hands. I recommend doing this before you remove the disc (see on) its much easier. |
 |
| Seal came out. It as a metal cased seal which is obviously superior to the all nitrile seal I will replace it with- but it is 40 odd years old and it is leaking... |
There is no nice way to say this- any further dismantling of the hub is the work of the devil. The whole thing is covered externally with grit and rust and internally with sticky disgusting grease. It is impossible to keep the two separate so I did what I should have done in the first place and refitted the seal and hub loosely back on the car so I could use Gunk (green) to clean everything thoroughly on the outside, all of the hub and the vertical link- wishbones. I waited, scrubbed and hosed everything off to achieve some measure of cleanliness- but its a disgusting job (see steering rack which was removed at the same time).
I then removed the hub again- picked out the seal and lifted out the bearings. I then set about spooning the grease out of the hub. There are times, and this is one of them, when I truly wished I hadn't started this job! After all the bearings did seem fine and if I had cleaned the hub and vertical link before disassembly I might have got away with keeping it clean enough just to fit a new oil seal.
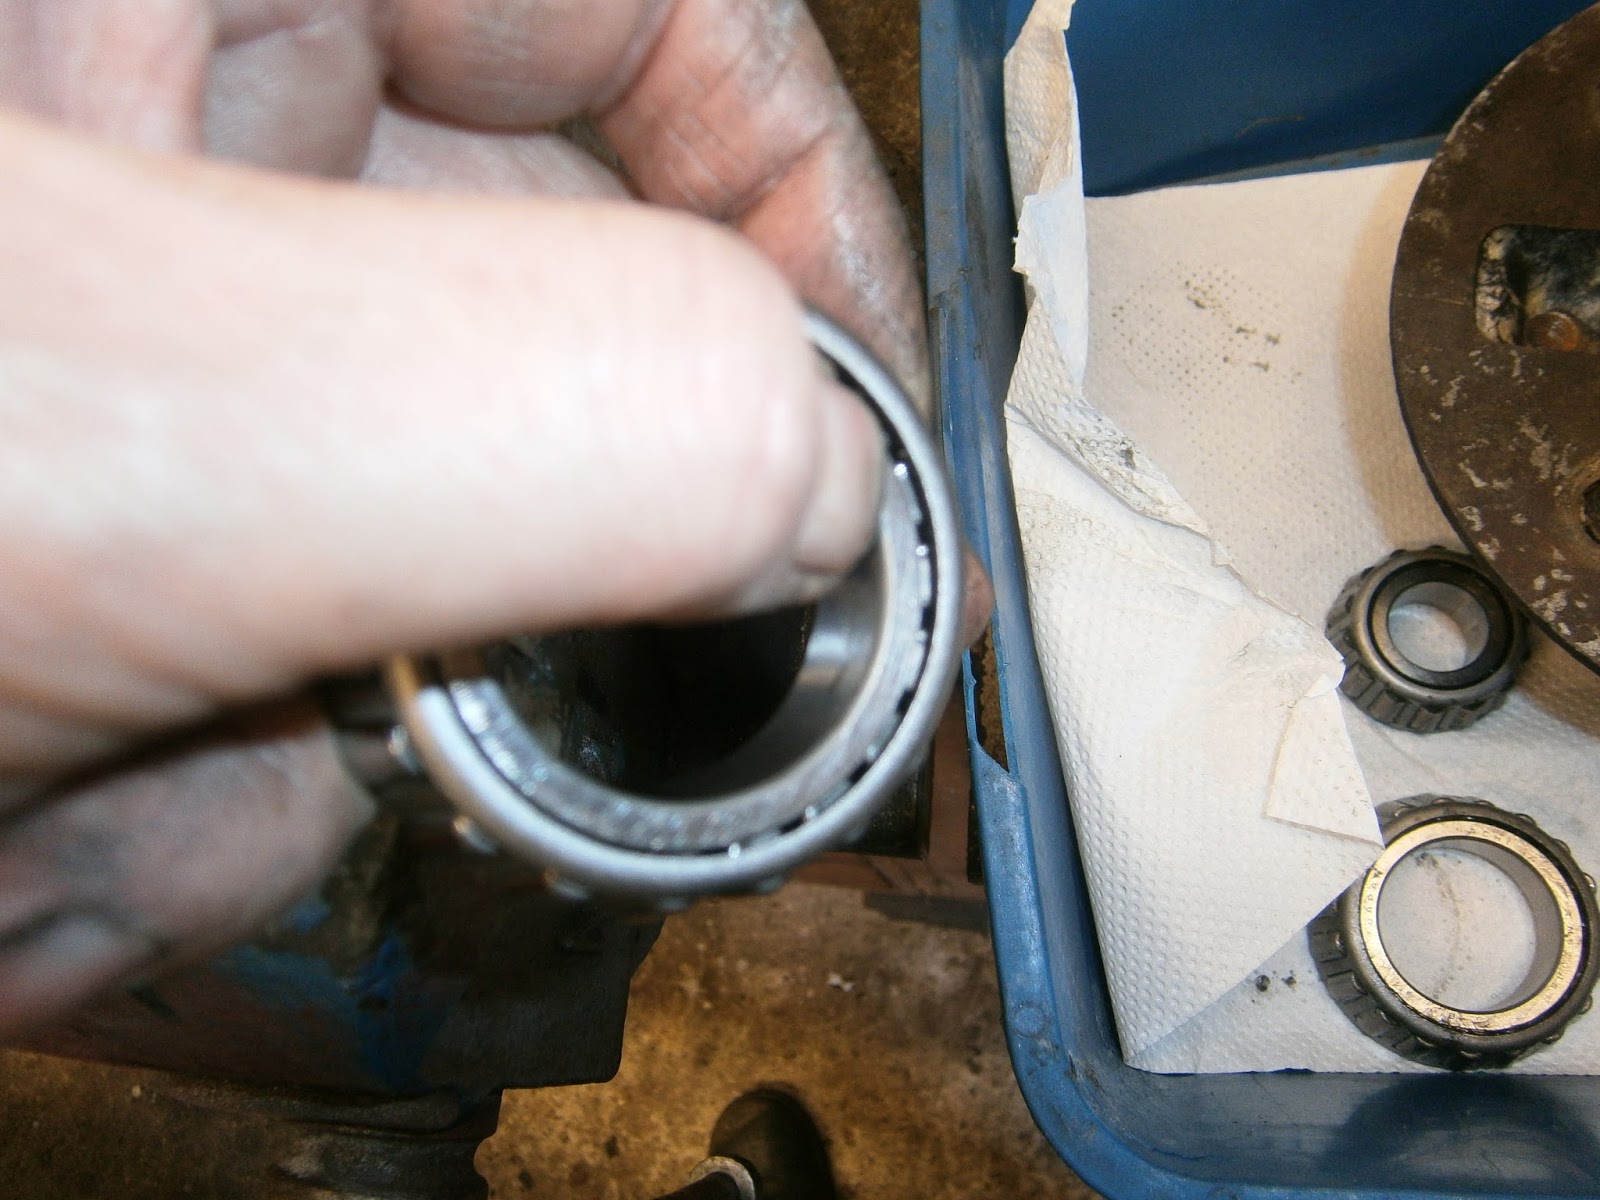
Anyway- got new bearings... I went for KOYO Japanese which are OEM quality but were obtained at about half the price from Wychbearings. I was then able to compare the old and new bearings. When under load there wasn't much difference in smoothness of rotation but the tapered nature of these bearings does allow a certain amount of "in out" movement of the inner bearing in its race. Here there was a difference. If you hold the bearing such that you are trying to press the balls out of the cage there is a small gap visible at the bottom. I have tried to show this below...
 |
| New bearing- pressing the ball cage backwards (gentle hand pressure), small gap between ball cage and race- RHS |
 |
| Old bearing- the same process opens a bigger gap |
This clearance allowed the bearing to twist slightly on the shaft and this tended to lock the bearing on the shaft as I tried to withdraw the hub. Its possible therefore that some of this wear was actually made by me when I pulled the hub off! Was it hard to remove because it was worn- or is it now worn because it was pulled against being hard to remove?? In any event I am feeling that changing this bearing would be a very good idea. Looking through the hub (past the outer race uppermost in this picture) towards the inner bearing there is a slot in the casting through which the rear of the race is visible
 |
| Slot inside hub gives access to back of race |
 |
| Support hub on blocks |
 |
| Using a punch tap downwards on the back of the race alternately on each side. |
The race can be tapped out from behind. Its important to use a tool with a plain flat end, it mustn't be sharp and you need to keep it as near to vertical as possible because the idea is not to scratch the inner surface of the hub. The ideal tool appears to be something called a soft chisel... I have no idea what this is or whether I have one so I used an ordinary punch. I checked that its end was flat and square and tapped carefully until the race dropped out. I could then turn the hub over and tap the smaller front race out in the same way
 |
| Tapping out front race on alternate sides of race to drive it downwards |
And front race removed
 |
| Until it drops out |
Fitting the new races is effectively the reverse, but make sure you fit them the right way round- the bearing has to be removable so the widest part of the taper in the race must point outwards.
The easiest way to ensure this is to place the whole bearing in position and then lift out the cage.
 |
| Offering up the whole bearing to make sure its the right way up and the cage is removable |
Push the race down into the hub with firm hand pressure until it locks. When its down as far as it can go with hand pressure gently tap it down on the edges using your "soft" chisel. Take care not to slip or mark the inner surface of the race.
 |
| Race fitted with hand pressure- widest side of taper facing out |
 |
| Tap it down carefully- I used a 12, 6, 3 and 9 O'clock pattern but keep an eye on it and if one side looks high then tap it down there. |
 |
| Race fully home. |
You can tell when the race is fully home as the sound changes- becoming more metallic. Also, because its hard on the hub shoulder, any tapping isnt absorbed and tends to bounce the hub upwards.
 |
| Front race installed in the same way |
 |
| Test fit bearing- just to make sure I've got it the right way round! |
I will wait to grease the hub and bearings until I am ready to install them as once the grease is in the things become grit magnets. I stored the hub carefully with the ball cages that matched these races until I was ready to fit.
 |
| Store hub with the ball cages matching the races installed. |
I was then able to remove the other hub and repeat the process. The following pictures are simply for my reference- they might be useful, but the method is exactly as already discussed.
This side I left the brake disc on whilst I removed the oil seal. Put a supporting wooden block under the disc (not visible here as its below disc) and a second above it on top so you can lever up the seal without rocking the hub/disc... much easier!
I then detached the disc and placed it and the back plate in DeoxC whilst I cleaned the mucky grease out of the hub and fitted new races to this one too.
 |
| Cleaning the hub. |
I put this into store until I'm ready to continue with the assembly, grease up and refit.
I reassembled the discs onto the hubs, cleaning the threads of the mounting bolts and using Loctite threadseal... then I did it again but the right way round!
 |
| OOps Discs mounted backwards! |
 |
| Ahh better- discs reversed to correct orientation. using the cordless impact wrench |
 |
| Attached with Loctite 2701 threadseal |
Refitting the Hubs
"The best laid plans of mice and men...." Who'd have known Robbie Burns had a Lotus???
Well dear reader- I hadn't expected any problems with this process- and therefore came horribly unstuck! I pushed grease into the bearings- no pictures because its a horrible messy job and I didn't want to get my camera filthy! Its easy enough- I usually wear 2 pairs of gloves and peel off the outer greasy pair once the bearing is greased so I can handle the hub without contaminating it. If you have any bubble wrap then you can make a hole in it and use this as a quick mask to protect the rest of the hub/disc from the flying grease!
 |
| Bubble wrap used as protection |
Anyway greased bearing laid into hub...
 |
| Oil seal... |
 |
| placed in position... |
 |
| tapped in with Draper seal press... |
 |
| ... and pressed home. |
I then greased the second (outer) bearing and loaded up the inside of the hub with grease before...
|
| Loading up inside of hub with grease |
 |
| bearing with grease worked in and... |
 |
| dropped into hub. |
...offering up the assembly up to the stub axle. Problems! The hub wouldn't slide back enough for the threads on the stub to emerge from the front bearing! This turned out to be due to an incorrectly positioned dust shield. The smaller of the back plate fastenings (which has a small spigot) hadn't entered its socket properly. I didn't think this was a problem at this stage and it was fairly simple to loosen this bolt, slip it into the socket and re-tighten. Problem was that fastening it in this incorrect position had unfortunately distorted the dust shield as I later found out! I went ahead and fitted the hub but it still wouldn't go back because it fouled the back plate. It turned out the central hole in the dust shield was no longer concentric with the axle. I did eventually fit the hub by tugging on the shield, but it fouled the edges of this hole making a terrible grating sound when the wheel was turned. I tried hard to re-position the shield with the hub in position but to no avail- the mounting bracket is I think bent out of shape by the misfitting event and I will need to re-bend it! This meant removing the hub again- and here I hit a snag because the inner bearing simply wouldn't pull off the stub axle. The outer was easily removed but nothing I did would shift the inner which was bound up on the taper on the stub axle. I had found this tended to happen during the strip and attributed it to wear- however that can't be the problem in this case as the bearings are new so it must simply be a problem with taper bearings in general. I had no choice but to pull on the hub and of course this simply meant that the oil seal was pressing on the bearing trying to push it backwards and off the taper. Its not designed for this and so eventually the inevitable happened and the oil seal popped out. This allowed the hub to slide off, but it meant leaving the seal behind with the ball cage and inner race still attached to the axle... bugger!
 |
| Inner race and ball cage left on stub axle- oil seal still there behind! Dust shield hole is closer on left than right in this pic. |
I now cannot refit the hub because the oil seal wont engage again and so I will need to use a puller to get the ball cage off- hopefully without damaging it. I can then re-bend the dust shield mounting bracket to get the hole concentric with the axle, reinstall the bearing and oil seal in the hub and repeat the attempt to fit the hub to the axle!!!.
In the meantime a thundery shower has drenched everything and sloppy wet grease- now grit encrusted- and greasy marks all over the brake disc are all things I was trying so hard to avoid. There ain't no justice! If I sound miffed- well its because I am!
Lesson: Test fit the hub before greasing or adding oil seal to make sure it will fit without fouling this shield!
Anyway... that sorted it with relatively little fuss- puller shifted the bearing- taking care to pull on the inner race not the ball cage- I don't think its damaged. A few attempts got the shield obviously more central and a test fit showed it wasn't binding. I re-seated the oil seal and refitted the hub which now turns without grating! I will seat the bearings and adjust preload before I fit a new split pin. With new oil seals the range works out at 3.4- 8.6 Newtons so a 10 newton balance should be fine.
I managed to set the hub to 6 Newtons. In fact the range is so wide that I don't think you would miss it just by doing it until it feels snug but smooth.
 |
| Installing new split pin (note this is a split pin...NOT as many call it, a cotter pin!) |
 |
| ... and finally tapping on the dust cap |
I then refitted the caliper- no problems
 |
| Caliper fitted- hose is now connected! |
... and the other hub- only slight event here was that the outer bearing (the small one) needed to be tapped gently before it would slip onto the stub axle, but it went OK and the hub seated without fouling the dust shield. Still to fit the second caliper but don't expect problems... famous last words I wonder...?