My general plan was to inspect, renovate or renew where essential and then rebuild and reinstall. I started out with the best of intentions to fully rebuild, swap and restore- obviously its easier and more certain to simply replace everything and produce a nicely reconditioned motor - but that has proved prohibitively expensive as even gasket sets are coming in at app. 200 quid for upper and lower sets, so I will settle for a working engine in good "used" condition- I hope I can at least achieve that. The aim is to check and reuse components wherever possible without a lot of new or recon parts. Trouble is this is not a new engine and there will be wear; so the question is how much wear is too much wear... and deciding that thorny question is going to be my problem! I am on a tight budget so I don't want to do any unnecessary work.
My rough plan of attack :
1. Clean motor as best I can plugging any exposed openings. I will use a steam cleaner/wallpaper stripper in combination with spray-on degreasant and vigorous brushing.
2. Remove head, remove valves and check for guide wear. Unless significantly damaged I dont wish to replace valves or springs, but just clean and regrind in the valves.
3. Check piston heads, fit clamps and check rotation and bores.
4. Remove tensioner, water pump and oil pump. Check all and if necessary rebuild or replace with renovated units.
5. Remove sump and clean out, check condition of big ends and mains as best I can, hoping to avoid any significant work on the lower end as I'm assured the motor is OK.
6. Replace front and rear crankshaft oil seals and any seals in the camshaft housings.
7. Reassemble with new gaskets.
I have already noted that there are a lot of nuts and bolts missing as the motor has only been loosely reassembled for storage so I will need to get quite a lot of those.
That's the plan anyway, I'm sure events will force alterations.
First job was to remove camcovers, camshaft carriers and head. The Cam covers were held on by only 1 screw each and this only hand-tight so easily removed. Luckily the cams had been oiled and weren't corroded even if everything needs a clean. When removed the top of the head and valve gear was visible, only two valve tops had shims- doubt that this is correct but I will need to check.
 |
| One cam cover removed |
 |
| Then the second. Note only 2 valves have shims? Sparkplug holes were stopped with rubber bungs after oiling for storage. Most cylinder stud nuts absent |

 |
| Cam carriers easily removed, don't look too badly corroded |
I removed the inlet manifold fairly easily but access was blocked to the central two lower nuts on the exhaust manifold. Well in reality there was probably access enough to get a limited turn on them but in my case both had been rounded off and were impossible to move. They would need to wait until the head was removed.The head was held on by only two nuts, easily removed and then it lifted off. Although this improved access to the lower manifold nuts they still couldn't be turned so had to be ground off before the manifold could be removed.
 |
| Exhaust mating flange on exhaust manifold stud OK but both bolt holes are opened. |
Having removed the head the pistons and any visible p[arts of the bores looked OK (below) but before I could turn the motor over I had to fit the liner clamps. I got the clamps laser cut in mild steel using CAD drawings from the lotus forum. The set of 5 includes 2 with slots to fit around the alignment pins in the block.
 |
Original is a pdf and processing has removed much of the contrast- but you can download it from the same place I got it! https://drive.google.com/file/d/0B2nifoCpaFSfNTAwM2Y0N2ItODRhNC00NTM0LWJkZjUtMTc3OWNhMzA0ODZk/edit?pli=1
I made the spacers using 2.5 inch lengths of galvanised steel cable conduit from an electrical wholesaler, add 10 M12 washers and nuts and they work beautifully. |
 |
| Block with liners installed, piston heads were undamaged |
 |
| Slots in two clamps accommodate locating dowels |
The motor rotated very smoothly, the bores looked great which was a nice surprise. There was no top ridge and they still have a nice cross-hatched and honed appearance. The pistons slide smoothly and although there was a little rust this was more of a discolouration and limited to the top of the cylinder above the ring travel range. It all looked clean and functional with no signs of valve impact on the pistons or damage to valve edges beneath the head. I sprayed the bores in WD40 and wiped them out to keep clean and prevent corrosion setting in while I have the bores exposed. All promising, I had intended to remove the crank and recondition but everything looked far better than I had expected- maybe I will get away with some fresh lube and a reassemble? I will check that all pistons rise to the same height above the block as differences might indicate conrod damage (later post)
Head. Looking at the head the valves all look in need or a decarb and a clean but they appear undamaged. Their heads seem to sit at different heights which may be significant, I will investigate more closely. I think its going to be worth removing the valves to check for side wear in the guides but until I strip them out I dont know what will be needed in terms of head recon. I'm not after building a race car here- just a solid reliable road car- well as reliable a Lotuses ever were... I will post separately on the stripping etc when I get down to it (later post)
Ancilliaries.
It was my intention to recondition or exchange most fittings on the motor- the main ones being waterpump, oil pump and chain tensioner, however this was starting to look expensive.
Water pump was only held on by one bolt, and that was loose! Easily removed and cleaned. I cant find any wear in it but I may simply send it in for an exchange unit. The price isn't that different from buying a rebuild kit and as I don't have access to a workshop press, I doubt I could replace the bearing myself anyway.
 |
| Water pump in situ |
 |
| Water pump removed, chain tensioner still in position |
Oil Pump - again this had been previously removed and was only loosely held on. I can't see any wear in it as the shaft looks sooth and firm, not sure how to test this for wear anyway. I will need to investigate whether this can be DIY rebuilt. So far I havent disturbed the impeller pump section (later post).
 |
| Oil pump in position, driving pulley |
 |
| Oil pump removed- from underneath |
 |
| Oil pump block mating surface, not too dirty, some sludge for removal visible inside. |
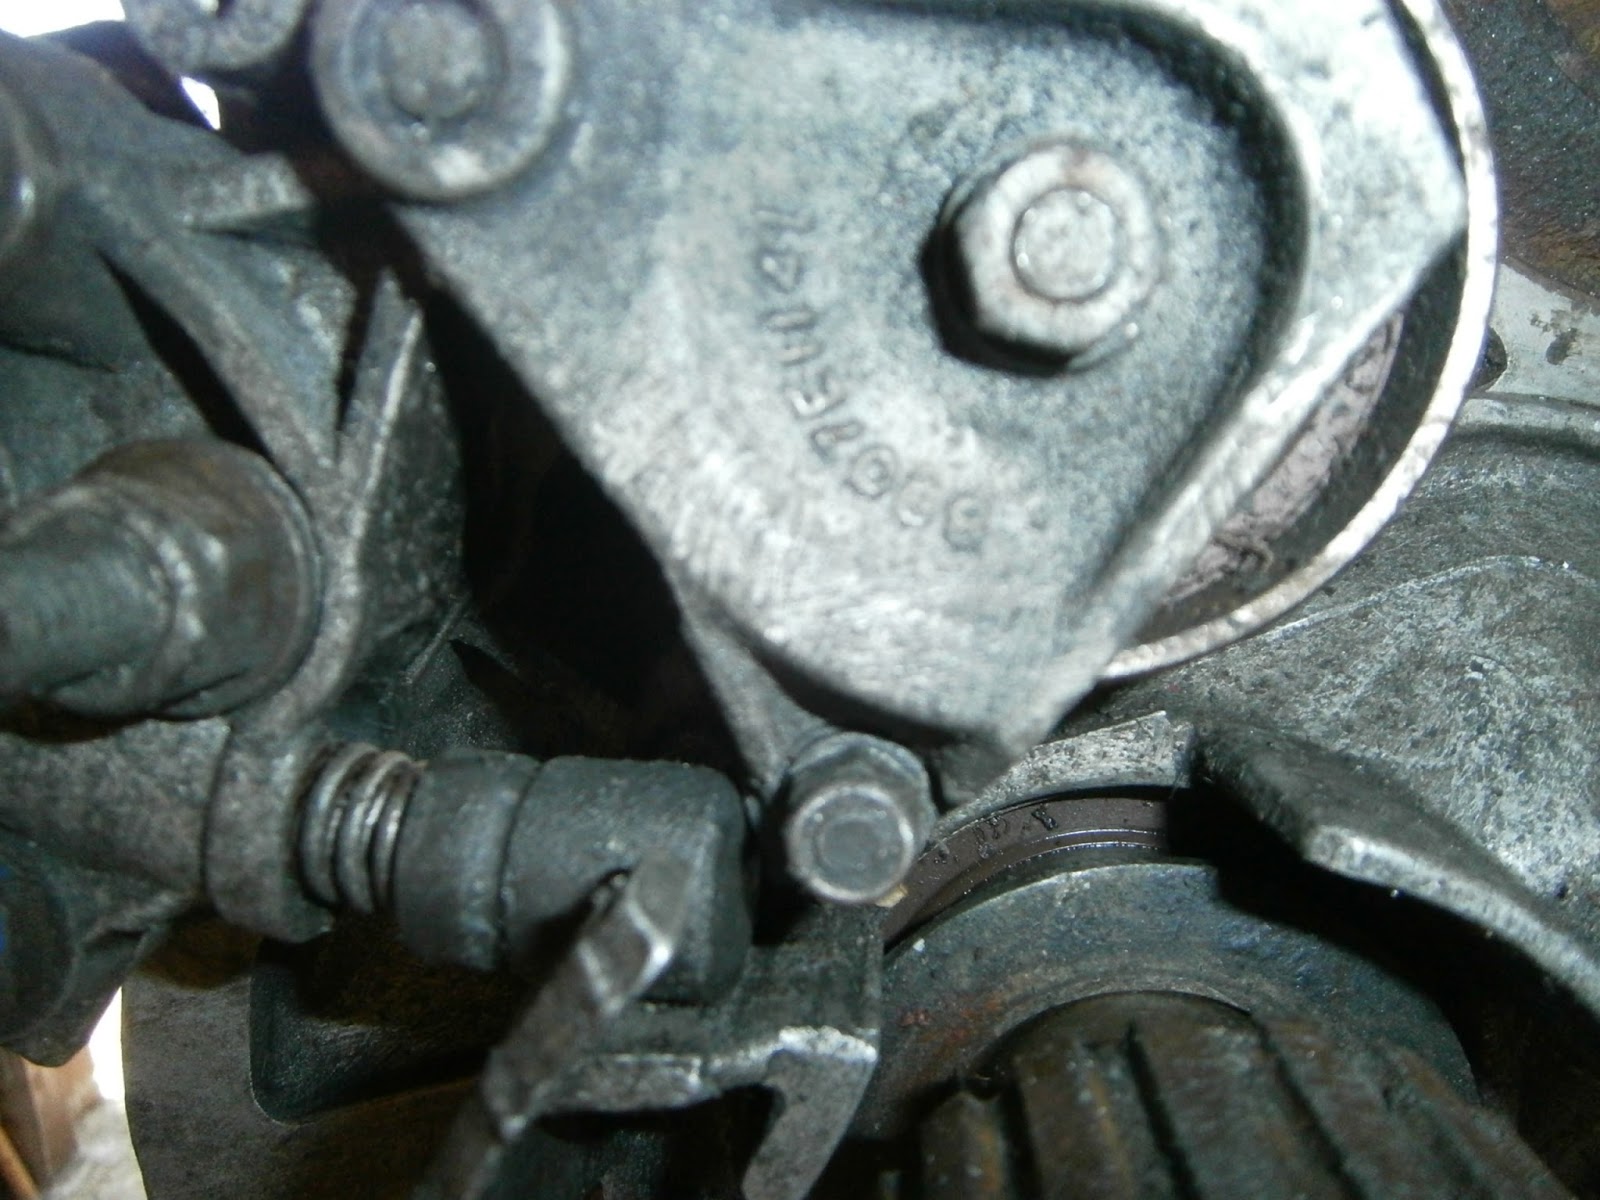
Belt Tensioner - Surprisingly this had not been previously removed and all bolts were tight. The spring was extended and had jammed against the moving pivot. Idler pulley bearing didn't rotate and had some surface corrosion.
 |
| Belt tensioner as found, some corrosion on tensioner bearing |
 |
| Belt tensioner as found. |
 |
| Note tensioner has popped out of its housing, should be retained by 3mm pin, teflon piston pretty scuffed |
 |
| Note lack of locknut on adjuster, stack of washers replacing spacer on lower bolt between tensioner body and snubber arm |
The tensioner was retained by a large nut threaded onto a stud in the engine block and fitted with a spring washer, washer and spacer on top of unit. A second bolt passed through the tensioner. Both the nut and the stud have a spacer behind the tensioner between it and the snubber arm, however the correct spacer was missing from the bolt and this had been replaced by a stack of washers. (see above).
Having removed the tensioner the pulley bearing was released by undoing two bolts, one through the centre of the bearing and a smaller bolt beneath (see below)
 |
| Tensioner removed, spring and piston could be removed from tensioner body. Note central bolt, removed to free pulley, second smaller bolt bottom Right.Pivot pin is at the top. |
 |
| Smaller bolt could be accessed with two 1/4 drive sockets. |
 |
| Piston, double spring and adjuster screw as released from tensioner body |