The car as returned from the garage had no longer got an operating speedo. This should have been an automatic fail for the MOT but as it was working when I took the car down I'm guessing it was OK in the test- thank goodness!
I suspected it was simply a failure to reconnect the cable after sorting the speedo light- but in fact no, this was connected and the slack in the cable suggested a break. I ordered a new one; these seem to be rare (i.e. expensive) but at least I got one from Lotusbits- SJS couldn't say when they would have any. For this car (1984) the speedo cable has a knurled screw at the gearbox end and a push fit plastic terminal at the dashboard end. There is a reinforcement sleeve as well.
First step is to remove (again) the dashpod- its only 4 screws on the dash and 4 on the column shroud and I've described this before.
Pull the dash forward to expose the speedo terminal plugged into the back of the instrument. Take care with the speedo lamp- mine kept falling out and probably explains why they could find no speedo light at the garage during the MOT.
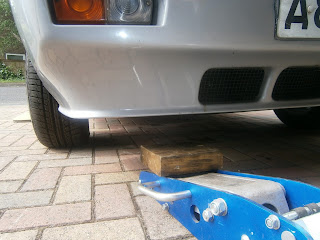
To get at the gearbox end you have to raise the car. My ramps are too steep and I cant drive onto them without grounding so I jacked up each side in turn under the suspension arm
...and lowered each wheel onto the ramp to raise the front.
The speedo cable is clipped to the chassis but you will need all the slack you can get, so release the P clip- some cars have two apparently but I had only one.
The cable enters the gearbox after passing through the gearbox mounting member. Knurled terminal visible on the box. This can be devilishly tight (in which case use water pump pliers) but in my case it was a tight hand tension... I suspect the garage have been here recently and loosened it- I'm not complaining!
Unscrewing the cable and there's the problem- the driving dog on the end of the cable dropped out. There is obvious damage to the cable shield (lhs) where its worn through to snap the cable
Looking down into the bonnet the speedo cable run is quite visible; it emerges from a grommet behind the servo and dives down the rhs of the motor. Here its identified by my finger.
... and this is the grommet where the cable emerges from the cab. It seems to be shared with the choke cable.
I levered the grommet out of the body

and then I had to release the choke cable from the carbs
and pull it out of the grommet.
On the inside of the car I tied a piece of string to the speedo cable so I could pull the new one through... this would have been a good idea but unfortunately I had "re-positioned" the cable for a more natural run when I had the pedal box out a while ago. Well there is obviously a correct route for this cable and mine no longer followed it! I couldn't pull the cable out through the firewall because I had passed it through gaps that were now too small to allow the plastic terminal to pass through. I made several fruitless attempts and then gave up and..
...cut the cable- no problems withdrawing it now!
the broken drive dog which seems to have snapped at the same point.
Re-installation was essentially the reverse although I had to work out a good routing for the cable by trial and error. Basically the cable enters via the grommet hole, passes across to the right above the steering column and then moves forward above the column mounting flanges...
 |
| cable enters via grommet hole |
... where it can be easily clipped into the back of the speedo.- note bulb holder has come loose again! Given the difficulty I had removing the cable originally, I put a smear of corrosion block grease on the speedo drive end of the cable.
To refit the dashpod you need to pull the cable gently from inside the bonnet as you ease the pod backwards- yes it is awkward.
Reconnecting the gearbox end meant working under the car- you need to rotate the cable until the drive dog can engage inside the speedo drive. It then pushes in easily- if it doesn't push in, its in the wrong position. I found that when the protective sheath was pushed up against the speedo drive the resulting cable was too stiff and thick; it was virtually impossible to align the cable and knurled screw so that the threads would mate. I had to slip the sheath back down the cable to get more room to manoeuvre in the gearbox crossmember. I could then insert the dog, tighten the ring...
... and then slip the sheath back up the cable.
The final task was to insert the grommet- not as difficult as I had feared since its prominent rear cone means that it self-centres in the hole and needs only to be pushed back firmly to seat. I did however need to enlarge the central hole in the grommet so that the cables could slip through easily as the grommet was pushed backwards.
Road test showed the speedo now working so jobs a good'un!


