1. Stripping the calipers
When I got this car it had a nice firm brake pedal. However the braking system as a whole was really only of cosmetic significance, push the pedal as hard as you like and it had no effect whatsoever on the motion of the car! Similarly the parking brake was totally ineffective. I am now moving towards the engine swap in this car and for this I will probably need to raise the front. At present my entire braking effort comes from the resistive action of the gearbox, and obviously this will vanish when I remove the existing motor and the box is free simply to turn. I don't fancy working on a car reliant entirely on wheel chucks, so I guess its time to tackle the handbrake- since this is integral with the rear discs then I guess I need to sort out both.
I raised the car (I started at the right rear) and removed the road wheel and tyre.
This exposed the brake disc and caliper with the drum in the centre- parking brake shoes behind. It would be nice if for once this car gave me a surprise in that something isn't as bad as expected- not in this case though! The disc and drum was corroded (mainly surface rust) and the whole unit was clagged in road dust, brake dust and spiders webs etc. My first thought was that this would all need replacing but at least I would try the renovation route first.
 |
| Road wheel removed, rear caliper and "frame" |
 |
| View from rear, caliper bleed nipple uppermost and flex brake connection union |
 |
| View from front- handbrake cable entry |
 |
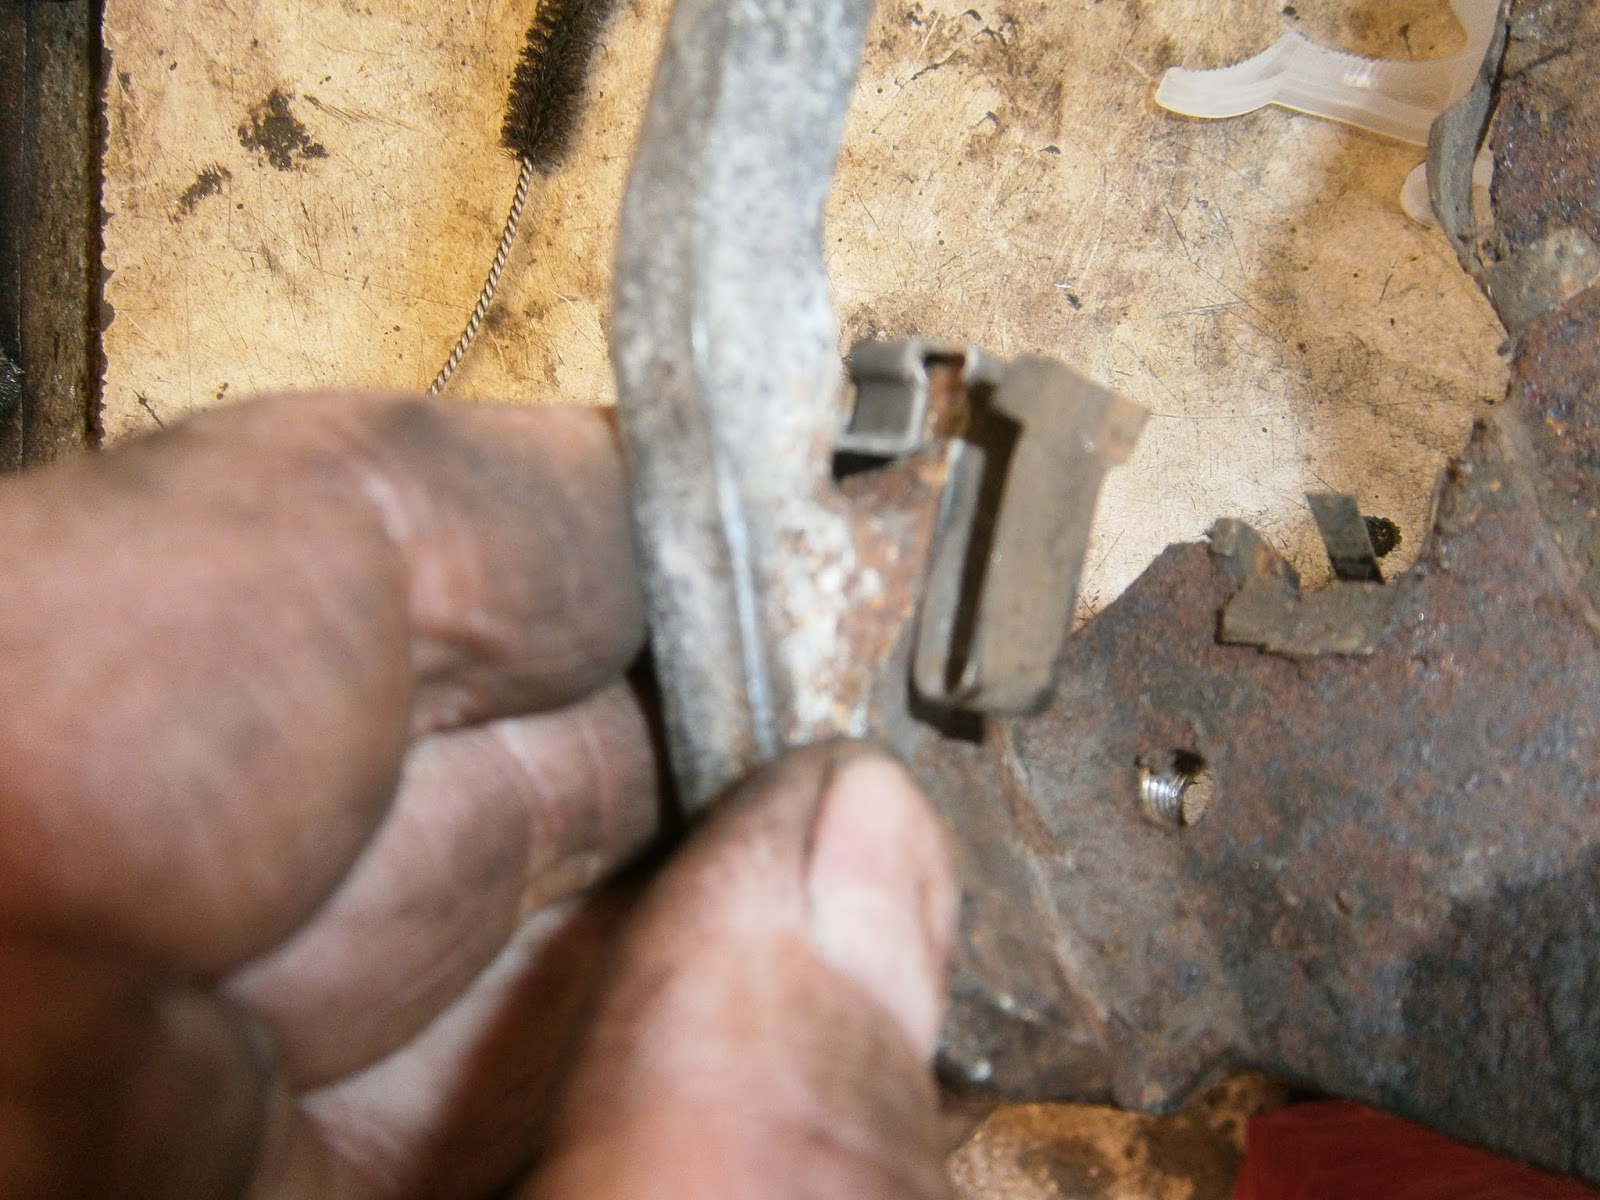
| anti squeal plate |
The first step was to remove the brake caliper. The caliper consists of two parts, there is a frame section (Torque bracket) bolted firmly to the brake back plate which carries a protruding shaft. The caliper itself slides on this shaft and so can be swung upwards disengaging from the disc for a pad change. This swinging movement is normally prevented by means of a locking bolt which passes through the bottom of the caliper. If changing pads then this would be the only bolt to remove... if removing the caliper then it would be necessary to remove this bolt and detach the brake pipes from the caliper and slip the caliper of the shaft- however this isn't straight forward as its path is blocked by suspension components and you may need to raise or lower the car in order to obtain sufficient clearance. However, in my case I wanted to remove everything for cleaning and renovation so I removed the swing bolt, brake pipes and both torque bracket mounting bolts allowing the entire frame plus caliper to be lifted off. This wasn't as easy as it should be as corrosion around the edge of the disc prevented the pads from moving off it.
 |
| Clamp off brake flex hose and then using two spanners (1 on the top hose union above the bracket- IE on the hose itself not the lock nut, and the other on the metal brake pipe connection to the caliper. Unscrew the metal pipe connection whilst not letting the flex hose wind itself into a knot. |
 |
| ... Then continuing to hold the hose hex terminus, unscrew the lock nut to detach the hose from the bracket. |
Unscrewing the swing lock nut form the rear
 |
| Swing lock bolt removed |
 |
| If changing brake pads the caliper will swing out at this point (in fact do not need to disconnect hoses) However you cant remove it because its fouled by the suspension, here you can see the pivoting pin on which the caliper slides, but it hasn't enough room to slide right off to the rear |
 |
| and then remove both frame mounting bolts so that everything will come free. |
 |
| The caliper and frame are then free- in my case it was tricky to remove because of rust around the edge of the disc. |
Once the caliper was removed the brake disc/drum unit pulled off easily. I washed this in degreasant and treated it in Deox C overnight in the hope that the discs could be saved.
 |
| Caliper and frame released |
The caliper and frame were separated by sliding the caliper of the swinging shaft. The frame section was wire brushed and sonicated to clean before being soaked in the Deox C overnight as well. I took some general views as a record of how the various clips were fitted to the caliper and frame ...
Disc pads had worn unevenly; one needed changing the other was pretty much new. This might be due to sticking pads or perhaps its a consequence of only having a single piston in this caliper.
 |
| uneven pad wear. |
The piston was frozen in the caliper as expected and this will need to be dismantled to free it and rectify the problem.
LEFT side...
Removing the wheel showed the calipers/disc were much dirtier than on the right and the handbrake adjuster was siezed!
 |
| Disc and hub as revealed |
 |
| Dismantled as previously, disconnect brake pipes and remove torque frame bolts, entire unit can then be slipped off. No fluid apparent in hose. |
 |
| Caliper pretty poor state |
A few general views to assist with clip/pad relocation.
 |
| Pads and clips virtually welded to calipers with corrosion- siezed fast |
 |
| Clip virtually united with caliper! |
I had to hammer the pads to remove them- they were really stuck! One pad fell apart on removal, but on this side pads didnt have uneven wear all of which suggests that a brake overhaul was probably needed even before the motor threw its timing belt. Caliper refurb continued below:
2. Stripping the parking brake
The handbrake/parking brake shoes are exposed once the disc/drum unit is removed. Both shoes were very dusty. I examined the rhs first and when I saw them I was convinced that I had found my problem; the shoe lining was very thin. However the manual states that this is only a 2mm lining when new and the wear limit is 1mm. My linings were at 1.5mm and so apparently still serviceable. There was some evidence of the shoes trying to lift at the edge so replacements will be required anyway.
 |
| Parking brake shoes |
 |
| Spring arrangement at top of shoes- rear of car to left, rear spring on top at pivot pin |
 |
| Shoe bottom junction with adjuster. Note cutout in hub flange used for adjusting and... |
 |
| Cable spring passing to the rear of the adjuster. |
 |
| Linings 1.5 mm thick |
Since I had concluded that the linings were thick enough it seemed that the lack of parking brake could simply be poor adjustment. I checked this by first making sure that the handbrake cable was fully extended. Removing the screw at the front of the handbrake trim allowed the lever gaiter to be lifted off to reveal the cable attachment point to the handbrake. this showed that the cable was actually fully slackened already. I was then able to wind the wheel shoe adjuster upwards and lock the shoes- This showed that adjustment was the culprit and I didnt need to worry about cable replacement- although its just as well I stripped the unit since I found the shoes are lifting.


No comments:
Post a Comment
Feel free to let me know what you think of this blog. I'm working on my own here so any feedback from those Lotus enthusiasts floating around "Blogger Bank" is welcome. Suggestions for process improvements especially welcome. If you like it please follow.