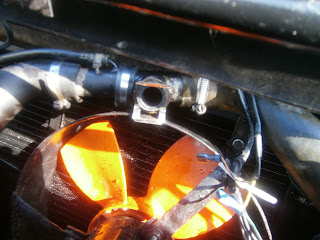
I had intended to upgrade to the screw-in switch used in later Excels and bought the appropriate switch pipe from Lotusbits. Unfortunately this lacks the water return spigot because in later cars this was incorporated into the radiator bottom hose. Consequently this upgrade would mean a complete drain down and a new hose. I therefore postponed this mod until I next drain the system and ordered a replacement for the push-in type of Otter switch currently fitted. I know that these can fail but they are widely used... my MGB has one for instance, and they don't always fail so I will stick with it for the moment.
I don't want to drain the system- partly because it would waste the fluid, but also because its quite difficult to do- I struggled for some time with the drain plug last time although admittedly that was in the cold and dark which has coloured my memory! I decided therefore to preserve as much fluid as I could- and this should be possible since the switch is located relatively high up in the coolant system.
Fluid can only flow out if air can flow in to replace it so I blocked off the filler cap with a couple of sheets of clingfilm below the cap. The system should then be sealed and air pressure should hold most of the fluid inside.
I Loosened the "P" clip holding the switch pipe above the radiator
Removing the old switch was very tricky- I had installed it reusing the grommet and so had stuck it in with Wellseal- this by the way gave a really good seal. The trick is to pull the switch out of the grommet and then the grommet out of the hose. My attempt to minimise fluid loss was reasonably successful- I lost some but only around 250 ml or so.
Note the clip goes on the grommet not against the switch
Fitting is the reverse (no Wellseal this time). Fit the grommet first...
... and then push the switch into the grommet. The switch pipe needs to be positioned so that water inside will cover the switch so this means the switch should be mounted horizontally or downwards.
Reconnect wiring (dielectric grease on contacts) and secure with a safety tie.
So with trepidation I fired up the motor and let it warm up. Using an infra-red thermometer I monitored the temperature of the switch pipe. Whoppeee!! The fan operated around 80 deg C. I did also test my old switch in a cup of hot water- and I'm pleased to say it really was dud.
This is the last "fitting" job I had to do on the car before MOT- I still need to refine my carb setting and this really needs a road test: The trouble is that the law in the UK doesn't permit any road testing so the first time I can drive it will be en route to the testing station and that's really a bit late for a shake out. There is also the small question of whether I will actually get there!! I find myself doing little jobs- like putting screenwash in the water bottle! Probably in an attempt to put off the dreaded MOT test. Ah well - if it was easy we would all drive Lotuses.


No comments:
Post a Comment
Feel free to let me know what you think of this blog. I'm working on my own here so any feedback from those Lotus enthusiasts floating around "Blogger Bank" is welcome. Suggestions for process improvements especially welcome. If you like it please follow.