Well a belated Happy Christmas and a Happy New Year to my follower and of course all/any readers. I hope Santa brought you whatever you need to finish your own Lotuses. Sadly in my case it was pants and socks... necessary and very welcome but not furthering my resto directly! Anyway, after 2 weeks of "family duty" its time to return to the car and finish the installation of the pedal box. Jobs still outstanding are fit the last steering column bolt and tighten all 3; clean, grease and install speedo cable and dashpod; reconnect all 3 pedals; adjust all controls; refill cooling system and bleed brakes and clutch. - All assuming that no new problems emerge and I never did manage to bleed the rear brakes so more work likely to be found there!
I inserted the remaining steering column nut and bolt; this was if you remember a non-caged nut that was free to turn as the bolt is tightened. Since the nut is a nyloc, it tightens onto the bolt even before its hard against the mounting and as the bolt is I think, too long, this means the bolt is free to flap about making holding the invisible nut with a spanner in a confined space very tricky. I therefore swapped the nyloc for a plain nut which could be screwed all the way down by hand and inserted a spring washer below the bolt head to try and put some tension on the bolt and resist any tendency to unscrew. I don't think this is likely given the position, but it made fitting and tightening the bolt really simple. Finally I tightened all the column bolts up.
 |
| Original bolt, washer and nyloc changed for... |
 |
| Plain nut and spring washer above original washer |
Reconnecting the throttle cable was a real bitch- I think it would have been easier if the throttle cable yoke/trunnion had been fitted with the keyhole opening to the right as you view it from the driver's seat (ie facing towards the side of the car). I think it would be slightly easier to insert the cable nipple from the outside of the pedal box; as it was I had fitted the yoke the other way around (this was the way I found it on the new pedal box- see my blog on refitting the box and its ancillaries) and opposite to the way my original trunnion had been fitted (see my blog on removal of the box). Since I had one fitted one way round and one the other I took pot luck, and matched the fitting in the box I was going to install- but I think I got it wrong. Access is simply too restricted to permit you to push the cable through the trunnion keyhole from inside the box. After three hours I gave up and decided I had to remove the whole trunnion again- At least I had fitted this with an R clip so it was comparatively easy using a pair of snipe-nosed pliers to pull this out and remove the clevis. I flipped the trunnion over so that the keyhole was towards the right (ie towards the nearest side of the car) as this will help I think in future, but as the trunnion was now free I inserted the cable while it was off. This cable nipple is a split bullet- the rounded end goes through the hole in the trunnion and the barrel section sits outside. The trunnion itself fits into a groove in the nipple so that it can transmit both pull and push demands. (This can be seen in my blog on removing the pedal box).
Of course refitting the trunnion and its clevis was again tricky: It wasn't possible to position the clevis as you really need fingers like an Aye aye - mine were just an inch or so too short- plus I lacked the second opposable thumb evolved by most long term Lotus mechanics! Anyway after an hour I hit upon using a magnetic retrieval tool to hold the clevis. As this is very slim it can slip up inside the box beside the crush of pedal shafts and offer it up to the trunnion once that had been safely hooked over the throttle pedal. I could then push the clevis through. It took a couple of attempts but this was much better than straining to get my arms in far enough and allowed me to rest my bleeding stumps.
 |
| Clevis pin held on magnet prior to introducing it up beside the trunnion on the throttle pedal- trunnion shown here for illustration. |
The R clip was likewise attached to the magnetic tool and positioned on the clevis. The clip was then pushed home using a steel punch held in the other hand. Once I had adopted the mag tool approach it took only 30 min to connect the cable.
I reattached the throttle cable at the carb end and while I was there I also reconnected the choke- possibly prematurely as I don't know for certain that I will not need to remove the carb tops again! While I was doing that I noticed several cracks in the outer cable. The wound inner case was intact so I covered these with heat shrink tubing to keep the damp out.
 |
| Choke cable; cracks covered in heat shrink |
In contrast to the problems with the throttle, it was the work of but 5 mins to connect the clutch push rod to the pedal- the alignment was perfect: Since this was the reason I had needed to start this whole horrible pedal box process, I'm very pleased with the result.
 |
| Clutch MC push rod trunnion secured to pedal extension using clevis and R clip- note pedal pulls in line with pushrod now! |
The brake servo push rod took slightly longer but wasn't too difficult. It was a bit fiddly to get the holes in the trunnion and pedal to align, but I positioned the clevis pin on the mag tool and pushed it through the trunnion and pedal using a screwdriver blade. The R clip was relatively easily fitted using snipe nosed pliers.
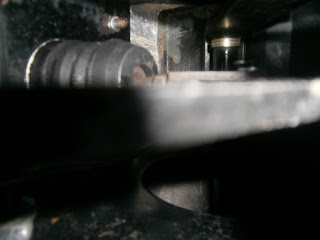 |
| Brake servo push rod attached via clevis through trunnion. Servo boot to left. |
I cleaned and applied corrosion block grease lightly to the end of the speedo cable before re-clipping this onto the back of the speedometer.
 |
| Speedo cable end cleaned and v lightly greased... |
 |
| ... and refitted to the rear of the speedo. |
I re-positioned the heater ducting so that it ran back through the pedal box to where it will eventually connect with the vent in the dash bottom panel. I was then able to push the dashpod back into place locating it over the two (left and right) studs and securing it with the 4 instrument panel screws. This was also a bit fiddly as its hard to get the electrics etc back correctly so that the instrument panel can slide back into the pod. However the ducting was the main problem (see above) and after much fiddling the panel eventually slid home. I then refitted the centre console (two screws in the tray) and gear gaiter section.
I still have to adjust the pedals but hey- this completes the whole circle-of-Lotus and gets me back to where I thought I was about a month ago when I found the clutch pedal action was so dodgy! I will add more about the adjustment - and maybe a few extra pics if I can remember to take them but hopefully now its onward and upward!


No comments:
Post a Comment
Feel free to let me know what you think of this blog. I'm working on my own here so any feedback from those Lotus enthusiasts floating around "Blogger Bank" is welcome. Suggestions for process improvements especially welcome. If you like it please follow.