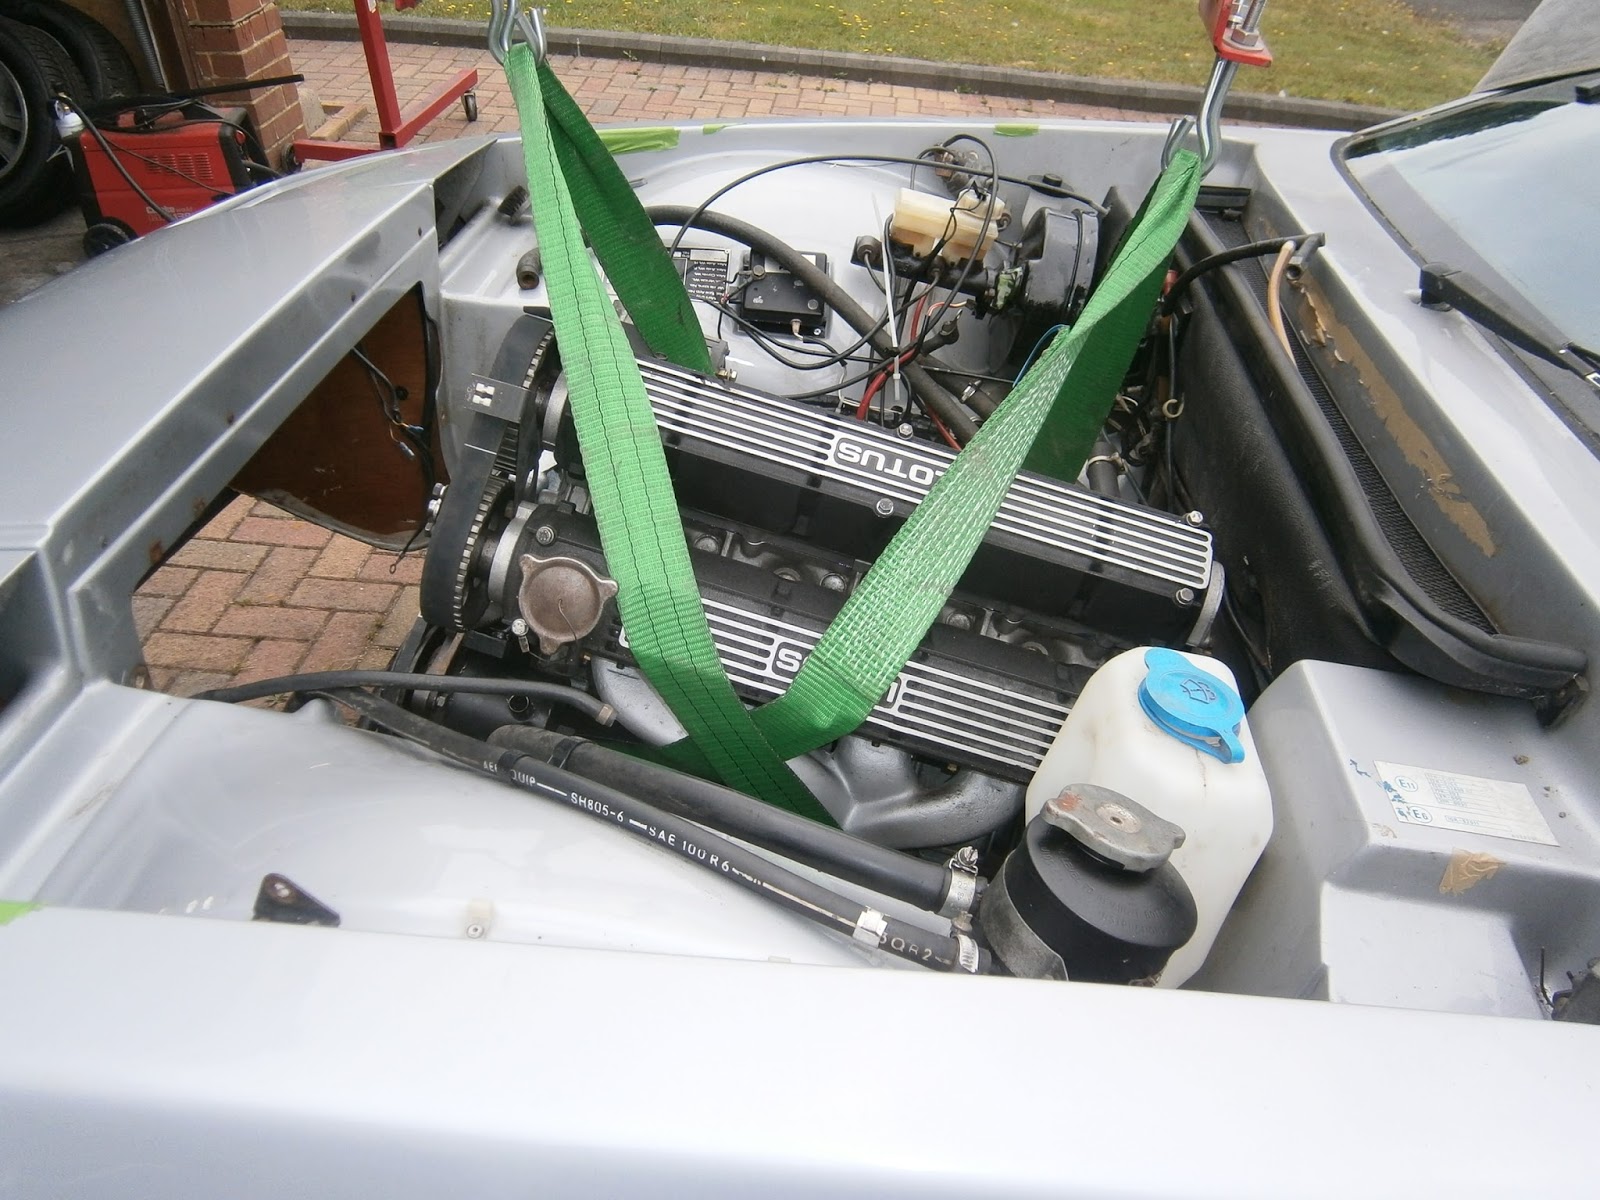
Refitting the Motor
OK- well the moment of truth- will I get away with this crank? Working on my own I anticipated that the refitting would be difficult (even if the motor can actually fit!). I used a load leveller to help control the motor's angle. The levelling bar gives pitch control- the crane offers yaw and in out positioning (although the legs will always foul on the jacks/stands or whatever mechanism you are using to support the car!). The big problem is lack of roll control along the crankshaft axis. I don't mean that the engine flops about, its just that its not readily adjustable, it hangs in the sling in whatever position it wants to and its hard to position it in order to line up bolt holes or clutch and gearbox and push it at the same time because its bloomin' heavy!
I also refitted the LHS motor mount because access to the three fastening screws will be virtually impossible when the motor is in.
 |
| Load leveller installed. |
 |
| Oops watch the door! |
 |
| Out of the garage!! |
 |
| Lowering the motor into the car |
 |
| Motor wouldn't slide back onto gearbox shaft splines. |
This pattern was repeated on two subsequent days... I simply couldn't position the motor. Here is a list of what I tried:
1. Although I still think it is necessary to fit the LHS side engine mounting- the rubber insulating foot of this does really get in the way so I removed it leaving the leg still attached to the block to get a bit more manoeuvring room.
2. I tried raising the gearbox up against the transmission tunnel- (increases slope of the shaft) some people report this helps.
3. I used a laser level placed on the gearbox shaft to try and gauge the desired position for the front crankshaft pulley and thus the angle at which I need to hang the motor to match that of the gearbox shaft. This helped but didn't allow a good fit because of the lack of control over roll positioning as mentioned above. I think its worth documenting though so pics below.
5. I tried a bore scope inserted through the clutch operating arm opening- didn't really help, it was very difficult to see the parts you needed to see to gauge what was fitting and what was jamming.
6. I tried some guide rods to position the motor on the gearbox- this was useful so pics below.
Laser positioning
 |
| using a laser line to work out front crank pulley position to align with gearbox shaft. Note bell house raised up against transmission tunnel. |


 |
| Circle described by laser pointer |
 |
| engine turns out to be at a rather smaller angle than I expected |
 |
| Going in- but too steep |
 |
| adjust pulley to height |
 |
| Line up rear by pushing in sling to roll engine- too heavy to hold. |
Guide rods
One suggestion from the excel.net forum is to fit long temporary M10 threaded studs as guide rods to ensure that the cases match as they are eased together
 |
| I cut four 4 inch sections of M 10 studding and checked the threads still worked |
 |
| Screwed these into the bell-house mating slots (inc the dowel sockets) around the motor. |
 |
| I used these to align the motor |
 |
| as shown |
Unfortunately- although the top bolts could be easily fastened, the lower bolts didn't tighten up. The dowels did start to enter their sockets so I am confident that this wasn't the problem. It seems therefore that the crank simply doesn't fit onto the gearbox shaft and the 3mm gap or so that is left is about the shortness of the drilling
 |
| Lower bell house mounting bolt clear gap at bottom of motor |
 |
| Residual gap- extends up the side, dowel is engaged in its socket, bolt tightened by cannot close up the gap. |
 |
| Dowels are almost engaged, note residual gap between the crankcase and bell house on the other side too |
What now?
Discussion with Lotusbits Mike Taylor support this conclusion. I'm not absolutely sure he understood my position- although this is a 1982 Eclat motor I think its an Eclat Excel rather than a pure Eclat as it lacks the wing-like projections on the sump used as engine mountings in the Eclat and there is no sign of these having been removed. Of course its always possible that the whole sump was swapped for the later style when the flywheel was modified, but in any event it suggests to me that this motor has already been used in an Excel at some stage in the past. In any event, he suggested three courses of action- two of which I had already guessed (modify/swap the crank) although a third involved fitting a later style bell house and engine mounts which would move the motor forward 1 cm and thus provide clearance for the gearbox shaft.
1. I'm not really happy about trying to move the motor by inserting a wider bell housing; there isn't much room and the changes in engine mounting requirement were confusing. Even if I did this I suspect it would lead to knock-on problems with the exhaust and other fits/clearances... does it reduce spline contact length for instance? Its easier to try it alone at home, but its not actually that much cheaper with bell housings (used) coming in at around 100 quid and engine mountings at around 60 quid each. Total cost about £220
2. Fit a replacement crank: A bolt-in replacement reground crank is £300, and I could specify the regrind size so that it fits with the +10 and +20 shells I have bought and fitted during the rebuild.
3. Use my existing Excel crank (in the old Excel motor): If this hasn't already been worn or ground too far, it could be reground to fit with my shells as above. This is likely to cost around £150 and thus appears to be the cheapest option. However I don't know that this crank is suitable for regrinding to these specific dimensions and removing it would reduce the likely second hand value of the whole spare motor so there would be an additional cost there.
4. I could have the auto motor crank machined to provide the required clearance: This would convert the valueless auto crank to the more useful manual version and preserve any resale price in the short motor. This is probably the best way to go for a crank swap as I know the crank is good and it already fits with my new shells. Cost for this is around £150
Options 2-4 involve stripping the motor again, and this would also mean adding the cost of new gaskets, oil seals and sealants to replace those (all new) ones that I have just fitted but which would be destroyed in this process! They thus carry extra costs. Also of course it will be a lot of work... BUT... I have found a company (Myanengineers) who claim to be able to machine the crank (giving clearance at the front and recessing the spigot bearing) whilst it is still in the motor! It does mean driving everything down to Bristol, but so far its the simplest option meaning less work for me - although one of the pricier at £210 plus petrol. I will try them and let you know how it goes.
No comments:
Post a Comment
Feel free to let me know what you think of this blog. I'm working on my own here so any feedback from those Lotus enthusiasts floating around "Blogger Bank" is welcome. Suggestions for process improvements especially welcome. If you like it please follow.