When I got the car the air box was in the boot attached to a degraded length of trunking. The time is now ripe for looking at this more closely in preparation for eventual re-fitting to the car. The box was in two pieces and no filter present. The air trunking I had assumed to be a simple tube- however it turned out to be multilayered featuring a foil layer, a spring, some foam and possibly even an asbestos layer! This didn't seem right so I suspect someone has substituted a length of gas fire flue lining??? Anyway I disposed of this (carefully) measuring the size of the box and also the Venturi plug inserted at the other end. Both were fastened with a degree of invention- duct tape and silicone, so once more that suggests that this isn't an original air duct. Both air box and Venturi need a hose that is 3.25" internal diameter so I will investigate and order a replacement.
In the meantime I looked at the filter box; latches are pretty rusty so I detached these to soak in de-ruster DeoxC. Each of the 4 latches is held on by two M3 cross head screws going into M3 5.5 mm captive nuts (handy size or what??)
 |
| Airbox lid- 4 latches all rusty |
 |
| Typical attachment- 2 crossheads with washers beneath going into 5.5 mm captives. |
 |
| Nuts seen here. |
I removed all fittings and left to de-rust in DeoxC. There was also a long spring- I'm not sure what this is for but it was attached as shown in the next few pics and I removed it also to de-rust.
 |
| spring |
 |
| spring attachment- a second hole in the box and the spring is inserted directly into the box frame. |
The box was missing both attachments; a split pin/washer for the throttle cable support, a clip for throttle spring support* and also the crankcase ventilation hose. I will need to find if any are lying about loose and can be refitted later. I have since identified the long spring as the throttle return spring. This has been clipped directly into the air box, presumably because the split pin mount has been lost. The seal for the air box is also missing although this may be supplied with a new filter (have checked, it wasn't with mine!).
* I can find no trace of this support- according to the parts diagram its part number X026S0074Z and it should be pop-rivetted to either the box or the induction hose. I cant find the pop rivet or even a hole so I will do without this for the time being.
I refitted the treated latches using the same screws and improvised a spring attachment using a split pin.
 |
| latches de-rusted and refitted |
 |
| split pin attachment for throttle return spring. |
My new paper air filter already had a thinnish rubber edge to it but not enough to stop it rattling around in the airbox. According to the parts list the two parts of the airbox are sealed onto the filter element with a rubber seal C907E0588F which I think must replace this skinny filter edge. However it seemed to me to a better idea to use some rubber sealing channel as I had some lying around and fix this to the box not the filter so it didn't need to be removed everytime you change the filter. This is narrow, split rubber channel edging (1cm section) from Woolies at £3.50 a meter- and 3 meters is enough for two boxes. This clips onto the edge of the inner section of the airbox and fits neatly inside the recessed half to give a nice looking join and holds the filter securely.
 |
| Split seal from Woolies- appx 1cm cross-section |
 |
| Clips onto box edge |
 |
| All the way round... |
 |
| Cut to length and seal with rubber cement from a puncture repair kit |
 |
| Box then clips together neatly and holds the filter tightly |
The ducting is part no B907E0836W in these early cars and should be fastened to the air box with a large wire clip (present), the fan cowling with a plastic tie (absent) and with an O ring (also absent)which should fasten the duct to the clip like feature that mystified me earlier on the radiator bracing strut. I ordered some 89 mm nitrile induction hose which came with two large clips that I hope will be enough to snug it down onto the airbox and venturi at each end.
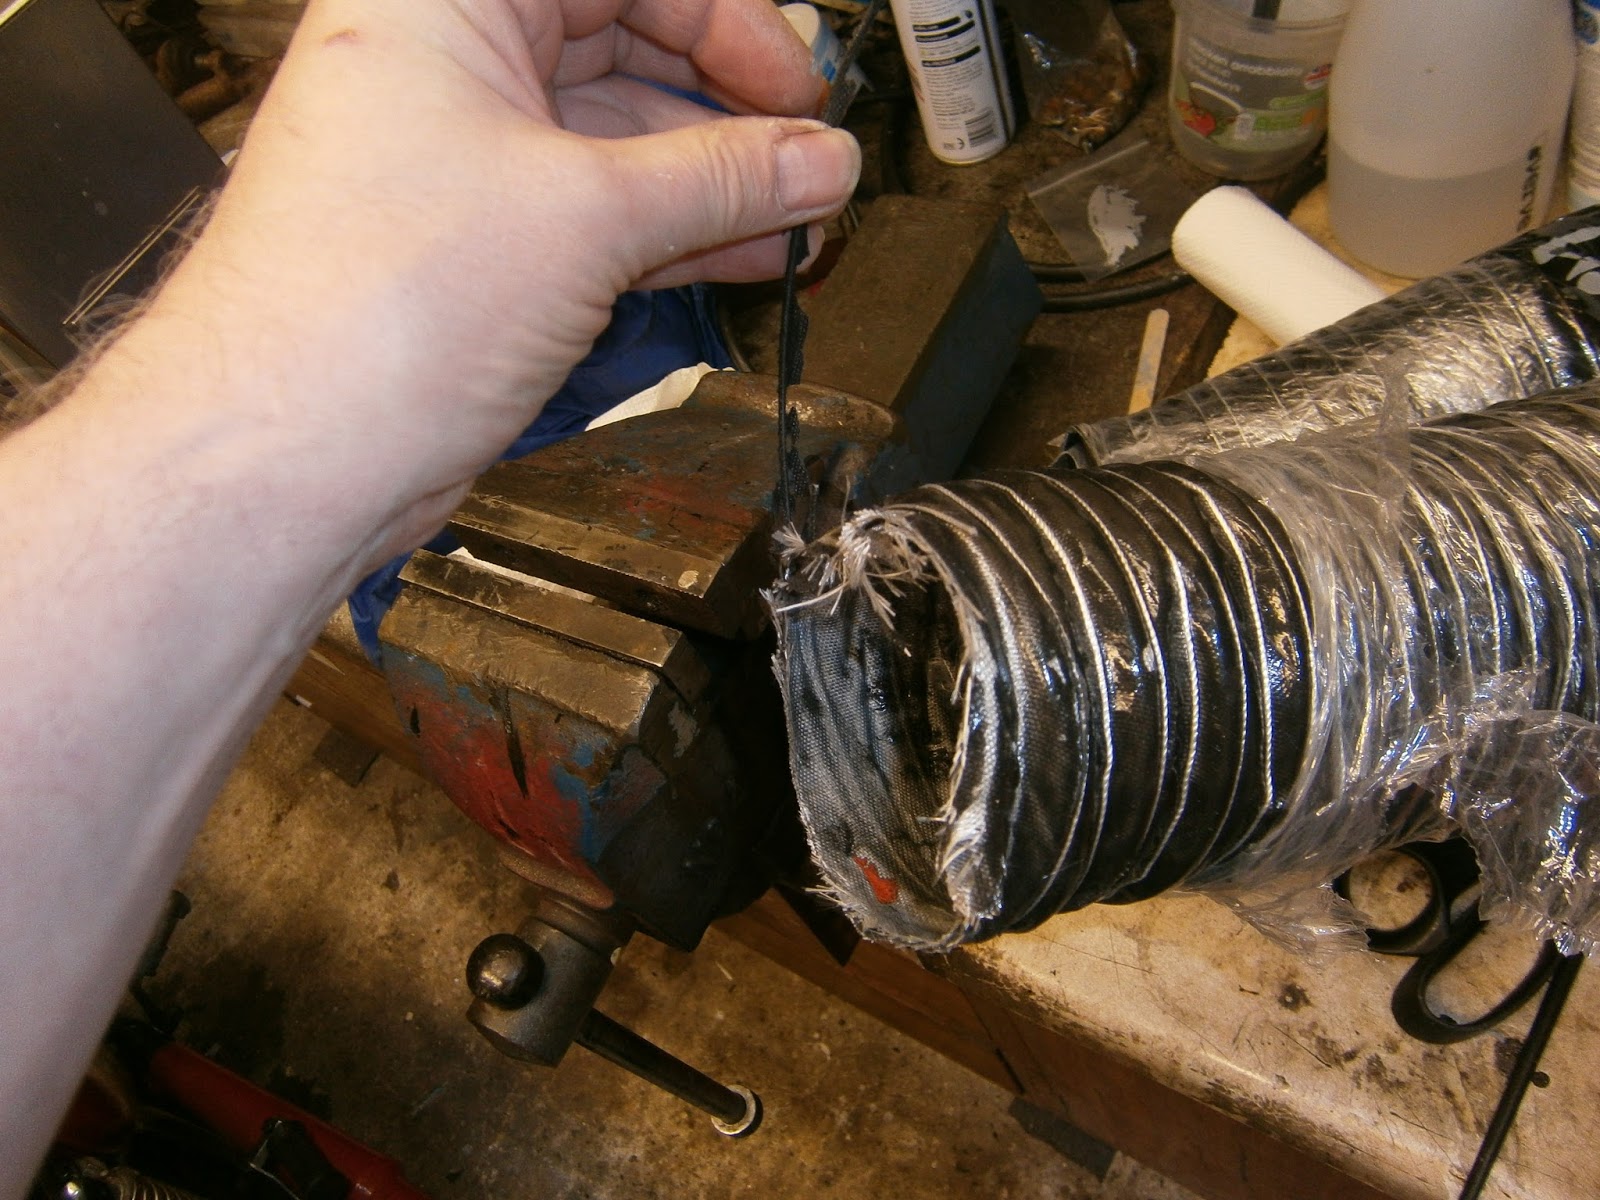
The hose I bught was about half the [price of a Lotus recommended part from the usual suppl;iers, but the consequence of that is that the ends arent finished. The hose is reinforced by a helical wire and this is left loose where it was cut. To stop it unravelling further Locate the protruding end of wire and bend the last 1.5 cms over at 90 degrees.
Bend the wire back down the hose and poke the 90 degree section through the hose wall beyond the next turn of wire
 |
| wire poked through hose below next turn of wire. |
 |
| Check wire is routed round the edge of the hose, not acroos the void. |
 |
| And fold the protruding wire back flat over the internal turn of wore in the hose wall. |
 |
| Trim off the frayed ends |
 |
| And use Ducktape and or exhaust tape as whipping to bind the frayed and and provide a smooth surface for eventually mounting the clip. |
 |
| End prepared |
The venturi that came with my car had a few bite-like chunks taken out of it. I doubt this will make much difference especially in a lc motor but hey, if the venturi wasn't doing anything I doubt it would have been included so I filled the missing sections with isopon
 |
| Isopon infill- smoothed down and... |
 |
Sprayed black ready for installation.
The airbox, hose and venturi are now ready for installation but obviously this wont happen until the motors are swapped so for the time being I'm storing the parts.
|


No comments:
Post a Comment
Feel free to let me know what you think of this blog. I'm working on my own here so any feedback from those Lotus enthusiasts floating around "Blogger Bank" is welcome. Suggestions for process improvements especially welcome. If you like it please follow.