Handbrake Renovation- shoe replacement.
Since the adjuster was seized on the LHS I would clearly have to dismantle the handbrake mechanism. I had hoped to avoid this as the RHS was just about acceptable, but at least it means I should get to understand more about how this arrangement works. I intended to work slowly with lots of pics to help reassembly- it didn't quite turn out that way...
 |
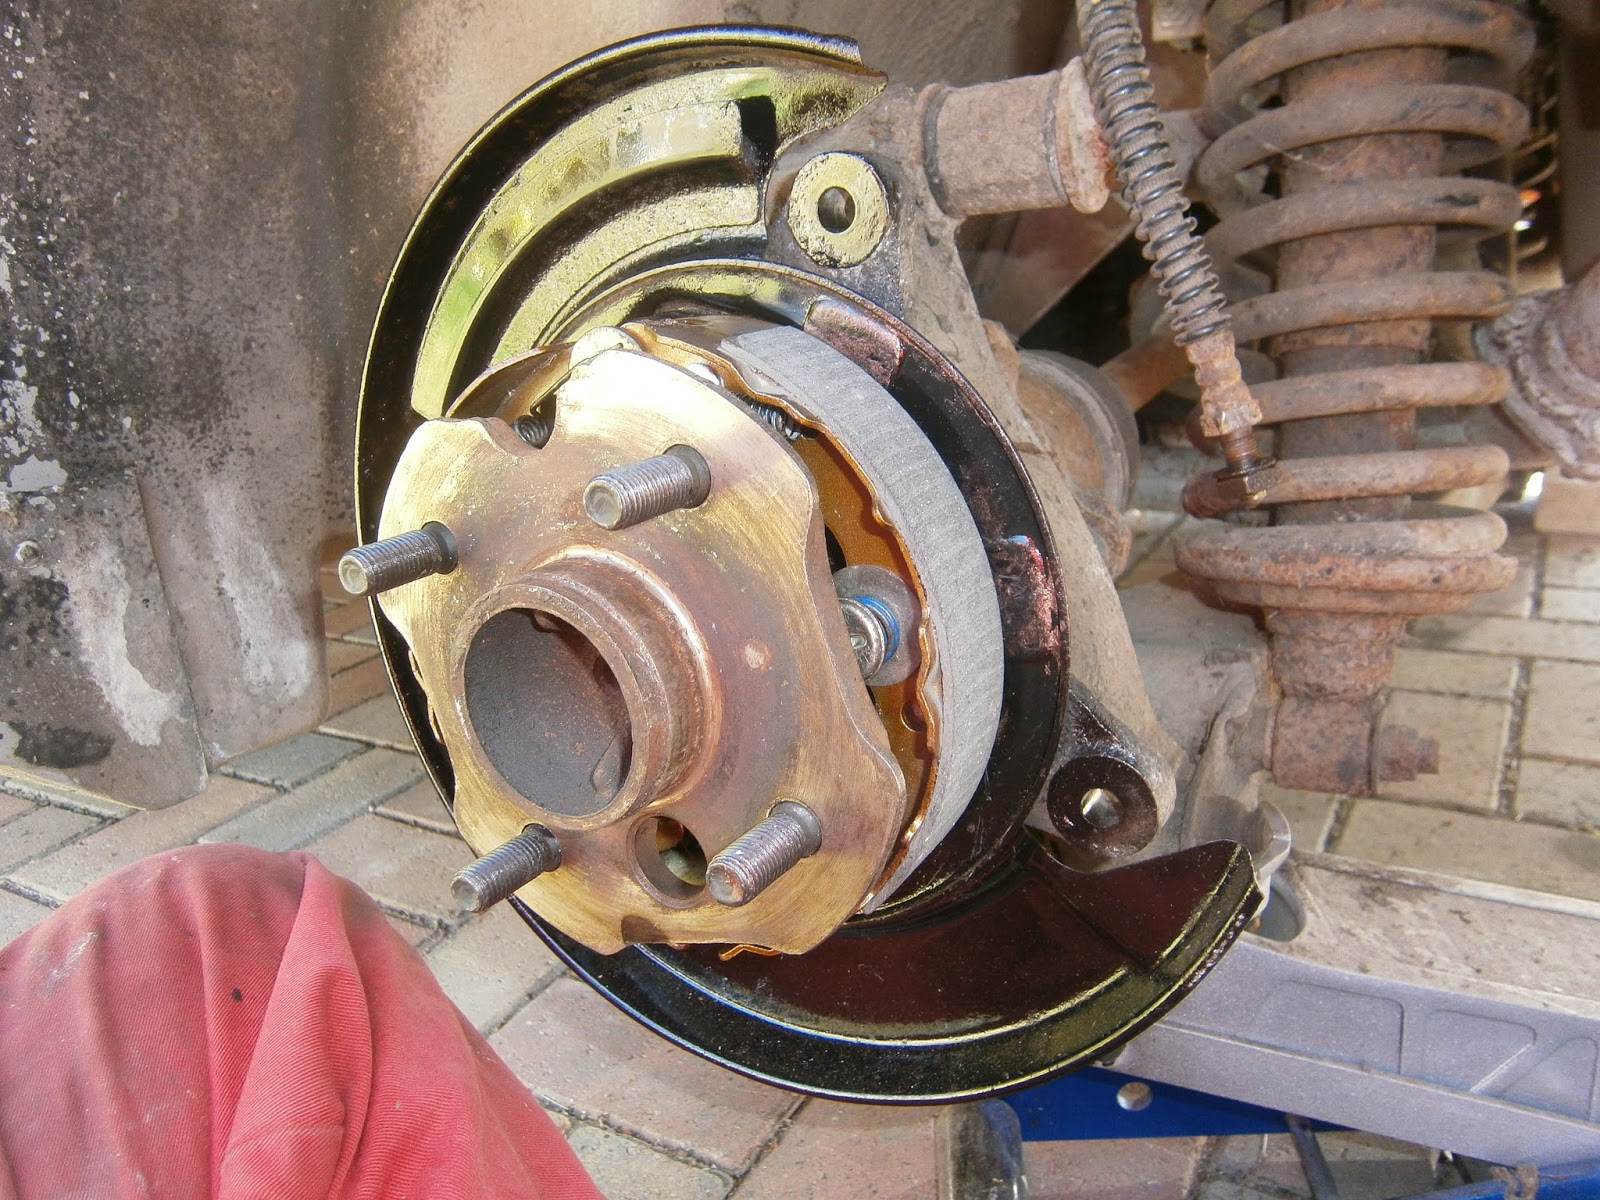
| Top springs as found- rear of car to right |
 |
| Unhooked one top spring and.. |
 |
| the other- I had expected the shoes to fly off but then I remembered the hold down springs. |
 |
| Depress cap washer and rotate 90 degrees whilst holding the pin. The top washer and spring then come off leaving base washer and pin in the back plate. |
I do have a hold-down spring tool- but I couldn't find it! I will managed to fiddle the retaining top washer and rotate it through 90 degrees using pliers- a bit messy and unsatisfactory- hope I can find a better method for reassembly.
I had expected chaos, so I gently eased the shoes off the back plate to try and see how they went together. On this LHS, the handbrake operating lever is attached at the top of, and behind the rearmost shoe. This pic shows the handbrake cable with spring engaged in this lever at the bottom, and the pivot pin at the top. The shim and C clip retaining the pin are out of sight behind.
 |
| Rear shoe just moved out of position |
 |
| ... and moved a little further showing the handbrake actuating lever and cable attachment |
At this point its necessary to remove the handbrake cable- its just a push lock so in theory easy... but it's tricky to do owing to spring pressure on the cable... and it was at this stage that the brakes did decide to go "ping". There was a shower of parts springs and clips and both shoes dropped down. I did know that there is a flat strut interacting with the actuating lever with its own spring behind the shoes - I had hoped to see how this fitted and what it does but I never caught sight of it before it fell out. So much for controlled disassembly!
 |
| Both shoes dropped down and several parts fell out! Shoes held in adjuster at the bottom- in fact they should have just dropped out so this is further evidence that the adjuster needs attention. |
 |
| View of hand brake cable now disconnected |
 |
| Rear of rear-facing shoe showing hand brake lever attachment. |
Bad news- once the shoes were off it was clear that this side were far more badly worn than the left. Shoe material was completely worn through in the centre and paper thin elsewhere. Blast- this was an expense I had hoped to avoid at present! At least it vindicated the disassembly process.
I know that these are Toyota shoes, and shoes for the Celica MA61 are supposed to fit. However Toyota fit 4mm linings to their shoes and Lotus (for some bizarre reason) only use 2mm. This means that the Toyota shoes are too fat. There are also reports that the various mounting points may differ, and although some claim to have modified them successfully, there's no description of how to do this and others have failed. I would love to investigate, but times being hard I can't afford to buy shoes that I might end up not being able to use. Accordingly I decided to take a hard swallow and order the Lotus shoes from SJS -twice the price but at least should fit (Am I naive or what....?)
 |
| The adjuster mechanism- stuck solid |
 |
| One end is a simple sliding fit and this came out easily. |
The adjuster consists of a cylinder carrying the adjuster wheel and two forked ends. One is a sliding fit in the cylinder and this could be removed easily, the other is threaded to advance as the adjuster knurl is turned- it was this one that was frozen in the adjuster. The threaded end faces to the rear of the car so that turning the adjuster knurl upwards will expand the shoes. On the right side of the car the adjuster has a reverse thread so that this direction is maintained.
 |
| Stuck end was easily shifted in the vice |
 |
| Thread cleaned and copper anti-seize grease applied. |
The adjuster was easily dismantled cleaned and reassembled. I also cleaned the various small parts that had showered out of the brake mechanism but obviously I cant refit anything until the new shoes arrive... and of course I work out how the Hell they are supposed to fit together!
 |
| In the meantime I cleaned and sprayed the brake back plate- now looking much better! |
Refitting/Replacing the Parking brake shoes
The shoes arrived and turned out to be from Ferodo even though Ferodo don't list this item. They were marked as distributed via an after market distributor "Federal Mogul" but I couldn't find any part numbers as these had been removed from the pack.
I found the diagrams weren't that clear so I assembled the shoes in the positions in which the various bits will be fitted. Note that the manual discriminated between the the front and rear shoe hold down and return springs. The forward shoe hold-down spring is white and is longer than the blue spring that fits on the rear shoe.
I couldn't find any differences between the front and back shoe return springs although there were traces of paint on one of them
 |
| Parking brake components, note white and blue steady springs |
 |
| I found the two top springs (shoe return) were identical |
 |
| back of rear shoe showing handbrake actuating lever fastening via C washer, shim is below washer. |
Before starting with the new shoes or pads I always cover them with masking tape to keep any greasy fingerprints off the new linings.
 |
| Taped up linings for protection |
 |
| The C washer is not a spring washer- I cant think why not. It bends as its opened and the lever removed. |
 |
| I reassembled the lever onto the new shoes, lubricating the pivot with silicone brake grease. I wasn't too impressed with this as it seemed too light and likely to spread too far around the barking system. I used it here, but for the rest I reverted to the more usual copper grease. |
 |
| Lever reassembled onto the new shoe and C washer bent back to retain the lever. |
 |
| Refitting the handbrake cable- push the spring back with a pair of snipe pliers and slip the nipple into the lever groove. |
 |
| These raised pads on the back plate (5 I think) need some grease- I didn't trust the sloppy silicone and went for copper. |
I fitted the bottom spring (white) to the rear shoe through the loops moulded into the shoe at the back. I then installed the rearward shoe by fitting the hold-down washers (large washer, spring, top washer) to the pin and rotating to lock the top washer onto the pin. The shoe-spring-shoe group could then be fitted by folding the handbrake lever behind the rear shoe and slipping the assembly underneath the hold-down spring. The pin should locate in the groove in the shoe with the large washer/spring/washer assembly on top. The rear pin has a bend in it and this should face towards the centre of the hub.
 |
| Rear shoe fitted under the hold-down assembly, other shoe hanging via the spring... |
 |
| As here. |
 |
| The adjuster is located at the bottom between the shoes with the threaded portion facing the rear. Check that turn the adjuster upwards will expand the adjuster. Slip the adjuster between the shoes so that the forks locate in the recesses in each. |
 |
| Assemble the actuating lever and spring- Note this is not straight and will compensate for fitting the actuating lever behind the rear shoe but the shoe itself on the front shoe. It has to be installed with the bend coming forward. |
 |
| ... and slip it into the metal slot in the handbrake lever visible here behind the rear brake shoe. |
 |
| Actuating lever installed into rear shoe, note bend in lever brings the shoe end forward. |
 |
| Front shoe hold-down locked onto the front pin, lift up this assembly |
Then using all three of your hands raise the forward shoe, pivoting it in the adjuster fork. Slip the shoe under the hold-down spring as it is raised and engage the actuating lever fork and spring into the slot at the top of the shoe.
 |
| Hold both shoes in place and compress them together, against the actuating lever spring, so that the shoes meet the pivot point at the top. Fit the forward facing return spring and hook it over the pivot point to hold the shoe in place. |
 |
| Forward top spring fitted. |
 |
| Fit the rear spring next, making sure that the actuating lever slipped into the slot compressing the spring. |
 |
| Shoes in place... and don't forget to... |
 |
| Remove the tape. |
 |
| At this stage make sure to check that the hub turns freely and well clear of the hold-down springs behind it. These can be stretched (especially the rear) as the hub is removed making them too high and they can contact the rear of the wheel nut studs as the hub is turned. |
Well so far so good! Unfortunately this is the end of the good news. I found that the hub was very tight to fit, and once fitted the wheel couldn't be turned. I centralised the shoes by pumping the handbrake lever and then the hub would turn a little way before locking up. What was worse is that the drum wouldn't then come off as it was tightly held on the shoes, mainly at the top. So much for these shoes being worth the extra cost! This gave me a problem though because I have to get the drum off to see what was wrong behind.
I noticed that there were two threaded holes in the drum- these are actually for two jack bolts which would push against the hub flange below, I went for a puller which I improvised as below
 |
| I have to improvise a puller to remove the hub which did then come free |
Overall removing the drum caused me more problems; since the drum was held on the shoes, this meant that the puller was actually dragging the shoes away from the back plate as the drum was pulled forwards. Once removed it was clear that the pulling process had damaged the hold-down system. At the front the top washer had been pulled right off the pin and the white spring was now detached. The rear spring had also been tugged hard and the bend in the pin straightened- lengthening it so that the spring was now too high and fouled the rear of the wheel holding bolts on the back of the hub as the wheel was turned.
Anyway- having got the drum off I could at least investigate the cause of the problem... Tell tale marks on the shoes showed where they had been tight against the drum and so I filed these regions down,. I repeated the test fit and file process until the drum would slide on relatively easily. I then fitted the wheel and tightened the wheel nuts to make sure the hub was forced fully home. Once more I removed it all again and refiled any new tell-tales. Having now sorted this side, its clear that the "fitted" shoes will always need adjustment and its important to do this in stages before forcing the hub fully on or removing the hub will cause problems. For the second wheel I chamfered leading and trailing edges of both shoes paying particular attention to the top either side of the pivot pin before I even tried to fit the hub. I pushed the hub on in stages, removing it and filing and high spots that were revealed until it slipped on properly.
NB. I obviously needed a new fitting kit for the first side and I found that a fitting kit from SJS could easily cost £40 just for pins, washers and hold-down springs! However the Toyota Celica kit (Delphi LY1408) does appear to be identical to that I had found in place in the car. What's more, it includes all springs and even new C washers - all at less than half the price! I therefore ordered one of these and I will let you know if it fits.
... Well not quite, I think I needed the Supra kit. However I only really needed the shoe hold down components and these were perfect. If anything the hold down springs were a bit beefier. The C washers. We're also fine but the top and bottom return springs were a bit too short. I was going to reuse the Lotus ones anyway!
So I fitted the other side as described and hey presto guys... I have a handbrake for the first time since I got this car!!!


I am oftn reading your practical hints.
ReplyDeleteThank you for documentation.
One question: do you remeber the diameter of the drum?
I have the problem that the drum from Brembo identical to my old ones have diameter 167 mm.
The set of shoes bought from brakeparts.co.uk for a Supra / Celica have diamter 170 mm.
Cant get the drum over the shoes .... :-(