The Belts
My car is one of the early so-called narrow-bodied Excels. As such rear seat belts were an option and my car doesn't have them. However, unlike my Elite, the car was fitted with a shoulder mounting point meaning that there is a possibility to retro-fit either a three-point lap and diagonal or a lap belt; The 3-point belt could be either a static or inertia reel belt and kits for each are available: Securon 200 is the static and 254 the automatic version.
I found a pair of new static belts at a reasonable price and as passengers in my rear (?) will be rare, these should be ideal. However I will also need two bezels to surround the openings I need to make so the belts can emerge from the rear sear back. These are available for Lotus but very expensive so I will use MGF bezels and I got a used pair.
The seat belts duly arrived- apparently of very good quality but the instructions that came with them are virtually useless- possibly because they have to cover so many cars. However that's no excuse for the poor quality and tiny diagrams- The worst problem though is that they are not internally consistent.
The belts supplied conform to layout 3, with mountings of type D and B on the long "tang" strap and either types B or C depending on the shorter "buckle" strap. Having identified the belts from diagrams 1-3 you are then invited to consider the anchorages in diagrams 4-6 and then the details for single or double mounting- in my case all single so diagrams 7-8.
So what are the problems? Well firstly all diagrams of mounting points "D" show a mysterious loop not present on the belt bracket. Diagram 6 suggests this may in fact be part of a cover for this anchor point- but if so then its not supplied in the kit either (manufacturers replied that the cover only supplied with auto belts- why show it in instructions for statics then?). My belts may therefore have 2 "B" mountings on the longer belt (like the lap belts in diagram 2) but if so then this isn't addressed either.
Fitting B seems straight-forward enough and its identified by the wider hole in the bracket which allows the pivot bush to penetrate. However the bracket fitted onto my belts for mounting B is flat not canted, as shown in diagrams 8 and 11. Similarly my fitting point "C" is canted and not flat as shown in diagram 9 and which strangely becomes canted in diagrams 10 and 11!! I may have mis-identified my brackets but that doesn't explain how they change from diagram-to-diagram... most vexing!
Things become even more mysterious when considering how to fit the shorter buckle belt (fitting C) which is shown in figs 9,10 and 11. If (and when) this bracket is shown as bent or canted, its clearly bent away from the support structure of the car (diagrams 10 and 11). However, if I were to fit my belts this way then the buckle would be upside-down on the lap, projecting into the body in the event of an impact- clearly not good in case of accident. Both my belts were supplied in this orientation which seems obviously wrong.
 |
| Buckle belt as supplied: If the buckle is upright then the bracket is bent upwards in this picture |
You can mock up how this would fit the wearer using a table for the wearer's lap!
 |
| Holding the bracket as shown in the diagrams- ie bent away from the structure of the car (ie bent away from the vertical) and the buckle is upside down on the wearer's lap (table) |
 |
| This is how the bracket as supplied would sit on the car body if the buckle is upright on the wearer's lap. p If the buckle is "up" then the bracket is bent towards the structure of the car, not away, and in this position it would foul the bodywork. |
My annoyance here isn't that it's not possible to fix the problem, its that the belt is supplied wrongly set -as far as I can see for all applications in which the belt might be fitted, and there is no mention of this or the "fix" in the instructions. You can reverse the buckle by working a twist through the bracket. This is a bit awkward as the strap is folded through the bracket several times so just follow the fold through, feeding the belt as needed to get enough slack at each point.
 |
| Twist the buckle 180 degrees so that it faces the other way- this makes a twist in the webbing. |
 |
| Work the twist down and through the bracket, pull out some slack and work it through the next slot and the next... |
 |
| ... until you end up with the free end of the webbing which just rotates. Here the lower belt has been fixed and the buckle now bends the correct way- upper belt in original orientation. |
 |
| Comparison of fixed and original belt positions if the brackets are placed as required so that their free side is angled away from the car structure. |
Two final irritations with these instructions are that the fitting kit includes a single brass nut whose purpose remains mysterious; and that the mounting bolts supplied are of two different lengths- 2 of 1" and one 1.5 inch. Neither of these points is mentioned in the instructions and its not clear where they were intended to fit.
In fact the bolts supplied won't work in the Excel anyway owing to the thicker body, and even the 1.25" bolts fitted at the factory are shorter than ideal and you will need 3 x 1.5" bolts! These are 7/16 UNF (20 tpi) and should be at least grade 5- I used grade 8.
The Seat Belt Mountings
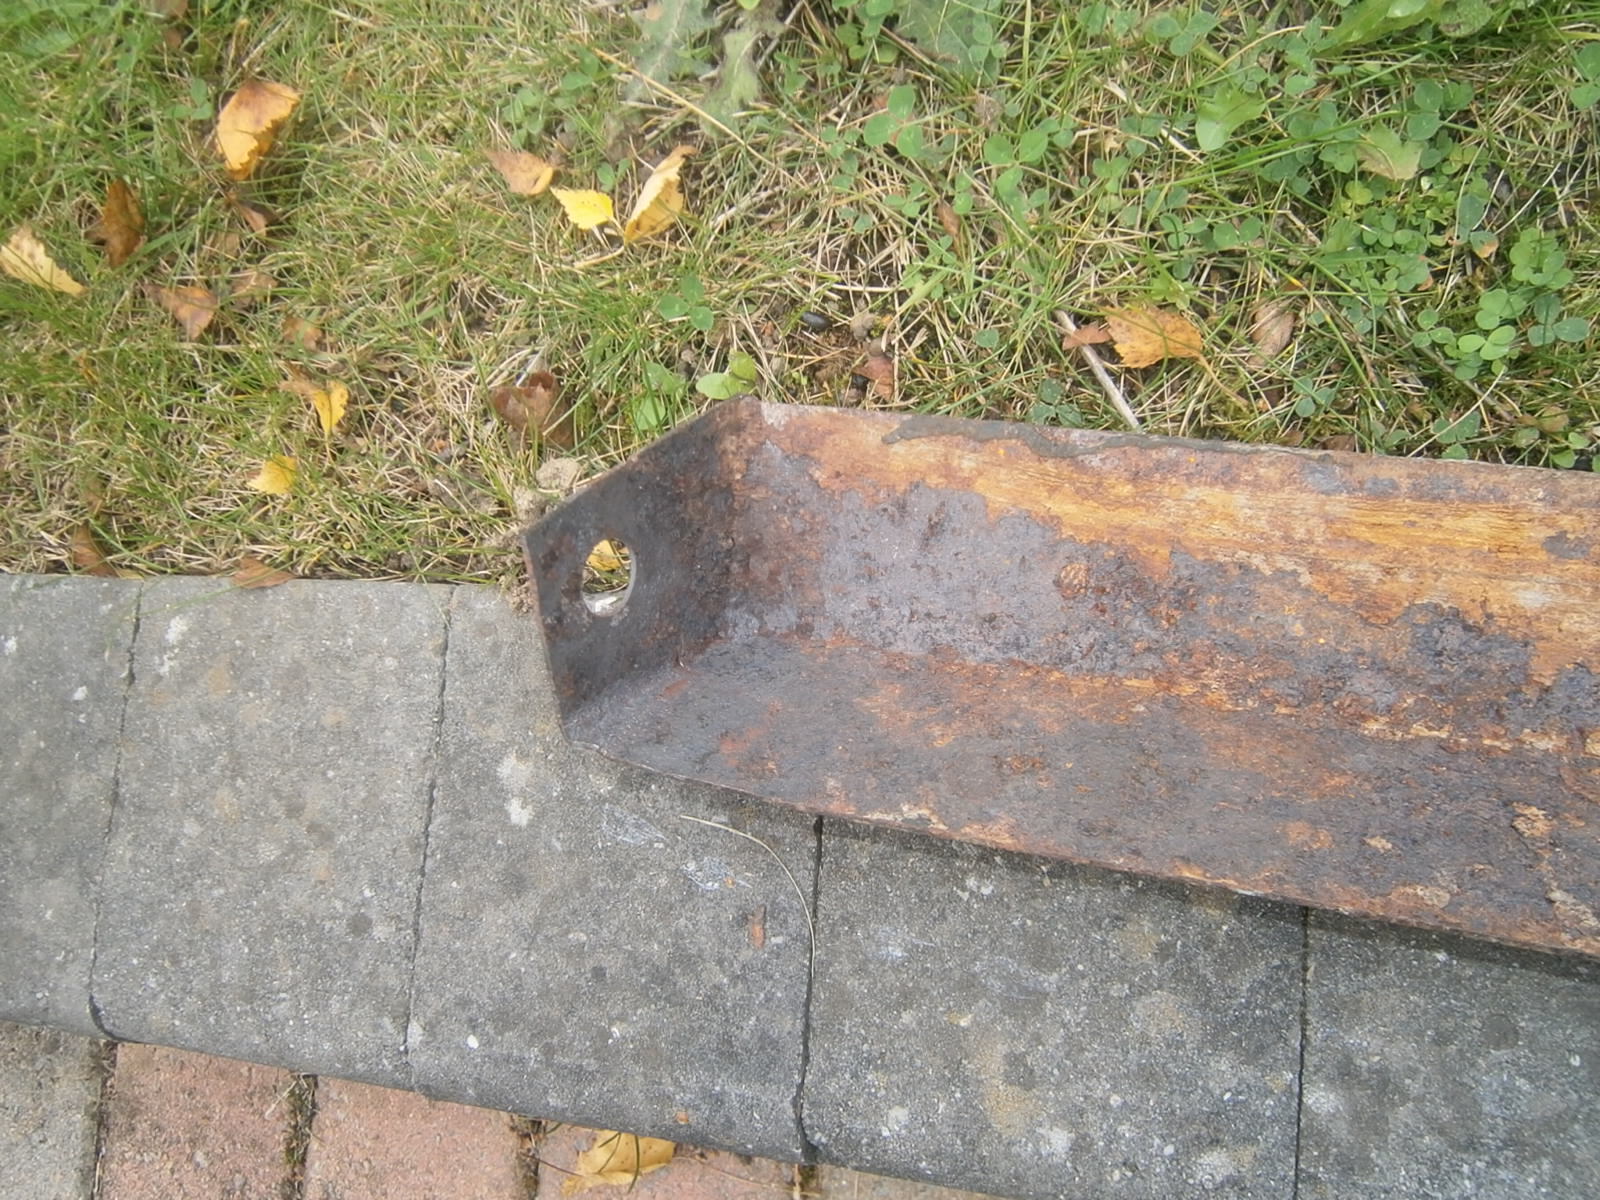
The seat belts mountings were supplied with the car even though no belts were fitted. They are supplied with 16mm high tensile bolts already in position and these have to be removed before the new belts can be fitted. Each bolt penetrates the GRP body into a weld nut fixed to a metal bracket reinforcing plate on the underside of the car. As supplied by Lotus neither the bolts nor the reinforcing brackets were stainless and, as these will always be exposed below the car, they can and do rust badly. Many of these cars actually need completely new brackets, but in my case (surprisingly) all were in good condition. There are three mountings per belt. The shoulder mounting is fitted through a bracket inside the car which will house the automatic retraction reel (inertia reel, IR). A single bolt secures belt, spacers and both upper and lower brackets. The lower bracket is accessible through the wheel arch and in my case it is rusty but sound. I don't want to remove the bracket completely but I will treat it and protect from any corrosion.
 |
| Wheel arch bracket below shoulder mounting, top left. Bolt penetrating from i/r bracket top centre |
Both lap mountings mountings penetrate the body at the base of the rear seat back cushion (ie at the back of the seat well) and enter a square shelf/bracket that passes along the rear of the seat well body moulding underneath the car. Bolts penetrate and fix to weld nuts in this bracket on each side.
 |
| Floor mounting reinforcement shelf/bracket (outboard side) fitted over the rear of the seat cushion moulding recess |
Stripping the trim
Removing the Seat Cushions
In order to remove these bolts you will have to remove the rear seat cushions and seat back. The cushions first: In some cars (as mine) the rear seat cushion is integral with the kick panel below it and this plate is secured by 4 self tapping screws, 2 just below the seat ...
 |
| Self tappers securing rear seat cushion, finger indicates LHS screw |
... and 2 through brackets secured to the floor and hidden under the sound-proofing. To get at these to have to lift the carpet and release the studs that hold down the floor soundproofing
 |
| Carpet mounting studs in rear footwell- remove and peel back the soundproofing |
The metal brackets (rusty) are pop riveted onto the inside of the seat kick panel
 |
| Floor bracket and floor-mounting screw indicated |
In my case the two upper screws were missing but the floor ones were present. Once all screws have been removed, lift up the back of the seat to provide some clearance...

Then raise the front of the seat and push it backwards parallel to the line of the seat moulding floor- this detaches a bracket beneath the seat cushion from a cross-strap.
 |
| Raising seat base/kick panel, then push the seat section backwards. |
Once the seat is removed, the bracket retaining strap visible in the centre of the space.
 |
Seat base moulding, bracket left on the body- the top piece is still attached below the seat base. I also found stray speaker wires passing beneath the seats to each the rear speakers. This doesn't look like the correct route. Note the rear quarter trim on the left which should also be held to the body with a line of screws- all were missing in my case.
 |
| Underside of seat showing hook that engages with seat floor bracket |
|
The other seat cushion is removed in the same way. On this side I found both kick panel brackets were secured to the floor, but only one was actually attached to the seat kick panel! The other remained fixed to the floor as the seat cushion was raised. I will need to repair this, it only seems to be pop-riveted onto the kick panel.
 |
| LHS rear foot well moulding, seat cushion /kick-panel removed. One of the mounting brackets has remained attached to the floor but not the seat kick panel! |
Removing the Seat Back
Once both seat cushions are out the seat back can be removed. This is located at the top by three metal tabs that slip through slots in the parcel shelf and at the bottom by 2 brackets in each seat cushion well that are screwed to the base of the seat moulding.
 |
| LHS Rear of seat cushion removed, seat back securing brackets indicated. |
Once the seat back brackets are out, the seat back can be lifted out.
 |
| Lifting the seat back out of the car, note the top tabs that locate into slots under the parcels shelf. |
Leaving the rear of the car now stripped.
 |
| Seat compartment now stripped. |
Note- I didn't remove the centre tunnel trim but with hindsight this would probably have been a good idea!
Removing the packing bolts and seat belt brackets.
The bolts for the seat belt mounts are accessed from inside the car once the trim has been removed, they are covered by the soundproofing mat which will need peeling back to get at them. There is one in each rear corner (inboard and outboard) of the rear seat moulding.
 |
| Inboard bolt RHS penetrating through centre tunnel.. speaker wire in seat well |
 |
Outboard mounting LHS under soundproofing
I found the the rear quarter trim on one side actually obstructed access to one of the bottom bolts and I had to cut the trim to get the socket in.
 |
| Rear quarter trim obstructs access to the outboard lower mounting bolt- its a big job to remove this newly trimmed quarter so I eventually had to enlarge this cutout to reach the bolt head. |
The shoulder bracket (reel mounting) is attached via single bolt inside it. Its tricky to remove this bolt as its close up to the cant rail which in my case is newly trimmed. It would have been better to deal with the belts whilst I was addressing the headlining but sadly I didn't think of it then.
|
 |
| Shoulder reel bracket up against cant rail. |
 |
| Looking inside the shoulder reel bracket- mounting bolt revealed |
All of these 6 bolts have to come out, and all will be corroded in. I recommend the following:
1. Use a good quality 6 sided 16mm socket, 1/2" drive minimum. Point holding sockets will not work. It will help if you have both deep and normal sockets
2. You must have a long breaker bar. Do not use an impact wrench as the hammer action will simply damage the body
3. Thoroughly clean all threads that penetrate through the weld nut on the exterior with a wire brush and apply Plus-gas or WD40 liberally to the threads and to the bolt heads inside the car.- I'm not sure this helps but it cant hurt!
4. Loosen both sides of the lower bracket together.
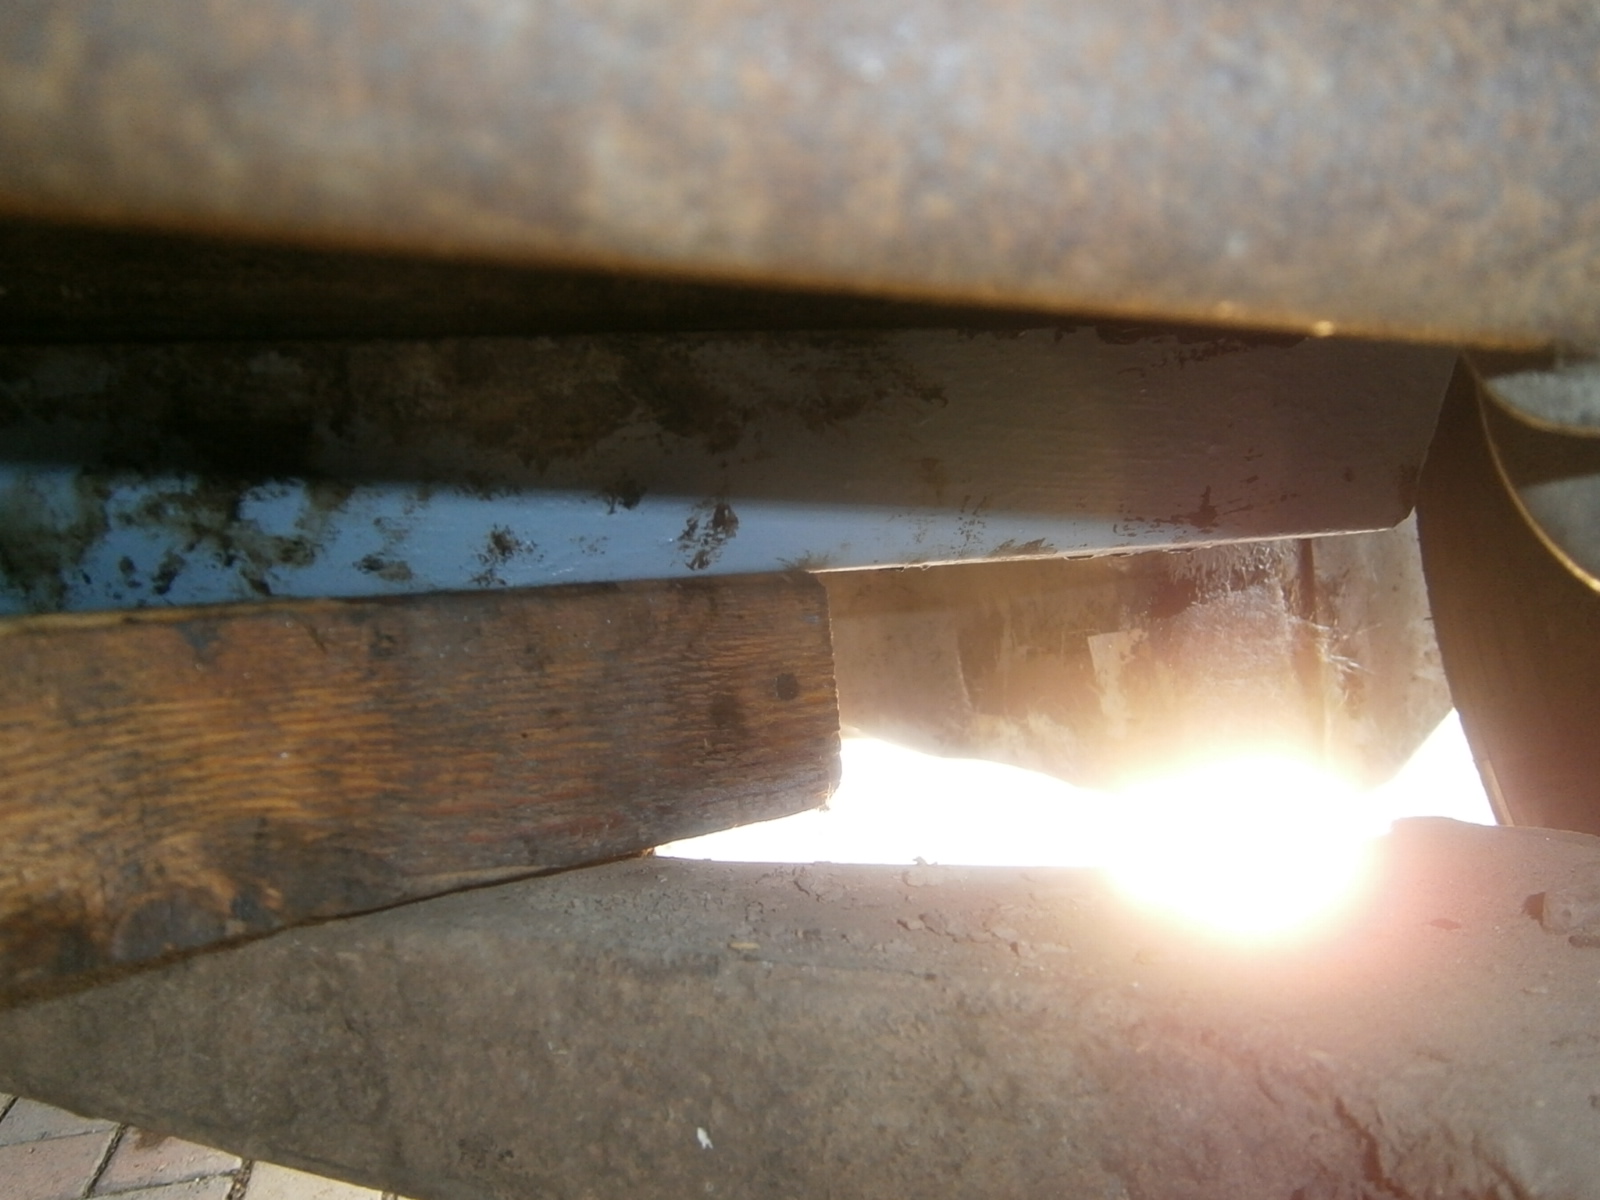
...As soon as you remove one of the lower bolts completely the rear shelf bracket will be free at that end. This means that the whole bracket can and will move as you try to unscrew the remaining bolt. This movement will damage both the bracket and the body around the bolt hole.
 |
| This is what happens if you take the outboard bolt out before removing the inboard- damage around inboard bolt hole at rear of seat cushion moulding. This will need repair with GRP and a metal strengthening plate.The answer is to make sure that both sides are free before removing any bolt completely. When you are ready remove the inboard bolt first. This is the most corroded and will take most force to turn. Provided they been loosened the outboard bolts should then unscrew without serious damage to the rear bracket. |
Running repairs
After some struggle I managed to remove all bolts and detach both shoulder brackets and both rear shelf bracket reinforcements. I did damage the body around one mounting hole before I learnt about the screw problem, and one bolt sheared off, but I got one bracket off with only minor damage and one with the stump of the bolt embedded. As far as the stump goes... I have been here before fitting seat-belts to my Elite; I know that these are hardened bolts and it will be practically impossible to drill the stud out. I opted to grind through the spot welds and remove the weld nut (containing the stud stump) entirely
 |
| Rear shelf-bracket- offending weld nut and stud ground off. |
 |
| weld nut off |
I knocked any dents out of the shelf brackets. The other nuts were all a bit obstructed so I chased their threads through with a UNF 7/16 tap
 |
| Tap to clean threads in weld nuts |
And refitted a new weld nut to the damaged bracket
 |
| Weld nut replaced! The bolt fitted is simply to hold it in place for welding. |
I wire brushed and cleaned both shelf brackets and both shoulder brackets before treating them with metal-morphosis.
 |
| All brackets treated with Metal morphosis.- blue phosphate converter |
 |
| ...and zinc primer |

I then used Tetraseal under body sealant to coat the inside of the brackets and also the inboard flanges as these will be inaccessible after fitting. I will paint the remainder once fitted, but painting the outsides now will just make them sticky and awkward to handle.
I treated all the metal brackets on the different seat components with rust converter and also painted the rear of the kick panels with primer as there seemed to have been some moisture penetration here. I reattached any missing brackets.
 |
| Rear of seat cushion before attention |
I made a GFRP laminated repair to infill the damage around the shelf/bracket mounting point
 |
| Laminated repair infill damage around seat belt bolt hole |
... and fitted a large repair washer to strengthen the area, profiling it to fit closely to the contours of the seat well
Cushion and seat backs were in generally good condition- I had to put a stitch or two in to hold any tears and a patch to cover some cigarette damage.
Seat Bezels
The main modification needed to was to the seat back where these had to be prepared to allow the belt to exit. The seat back GRP former already has exit slots moulded into it, but in the absence of belts these have been covered in fabric.
 |
| Underside of seat back, note rectangular opening in the GRP frame that would accept the belt bezel and allow the belt to exit from behind the seat back. |
If I had genuine Lotus bezels I could simply open this slot up and clip the bezel in place... I think. However these are expensive so I am using MGF seat belt bezels which are narrower along the belt width, but much wider from front to back. These bezels are designed to clip into a plastic seat surround which means there is the possibility to clip into the seat back.
 |
| Working on the back of the seat back, hold the front of the bezel tight up against the opening in the seat back |
 |
| Maintaining this position, drill screw holes through the GRP back |
 |
| From the right side, screw the bezel into place through the leather before cutting the slot open. |
Cut through the leather inside the bezel and pull some foam stuffing out so that the bezel can settle down into the leather as the screws are tightened. Push the front down until it clips into the GRP seat back slot opening. I fitted thread protectors over the sharp screws at the back. With static belts these will clear the belt in use, but I'm not so sure that they would do so if using automatics.
 |
| Bezel installed and gap opened |
I think the MGF bezels are an acceptable stop-gap although I may be able to get genuine Lotus items at a later date.
Fitting the Belts
When fitting the belts I would suggest using new bolts of at least 1.5 inch length. The 1" bolts supplied are too short.
Fit the lap mountings first because the shoulder mounts have to be fitted through the seat back and this would then obstruct the lap mounts.
Its a job probably easier with 2, but I managed by wedging the under body shelf bracket into position against the underside rear of the seat well using a wooden block on the rear suspension arm- don't forget to remove it later!
 |
| Wooden block to wedge bracket into position against the rear of the seat well. Final alignment was using a podger before screwing in the bolts. |
The belts could then be screwed into their mountings with the combination of washers and spacers as described by Securon. I also added a large washer in all cases against the GRP to spread the load.
Its necessary to adjust the shorter buckle belt at this stage because it wont be possible/easy when the seats are fitted and the bolts done up tightly. Passenger belt adjustment in use is through the tang belt only. Ideally you want the buckle to sit beside the passenger's hip. However the rear bucket seats in the Excel are very narrow, and in this position the belt is really uncomfortable. Its therefore best to make it a little longer and have it rest on the passengers lap at one side. Naturally this is a difficult adjustment to make when the seats are out and you have no passenger... guesswork!
 |
| Lap belt mountings in position. |
The seat back can then be positioned- feeding the belt through the bezel and checking (several times) that the belt is the right way up and not twisted. I refitted the reel bracket even though I don't have a reel because it reinforces the body and positions the belt run correctly for exit through the bezel. You will definitely need longer bolts here! Its very awkward as you are working over the as yet unfitted seat back, but once the bolts are in (bracket tight, belt should still swivel easily on the penetrating bush) the seat back can be pressed back into position and out of the way.
 |
| Seat back back against the rear. |
As the seat back goes backwards to meet the parcels shelf the three tabs should enter their slots under the parcels shelf to emerge in the boot area (behind boot trim). Note that these slots are horizontal and so it would be wise the straighten the tabs before refitting the seat back- I forgot!
 |
| Seat back tab emerging through its slot in the boot above the fuel tank |
I think it would be great to pull the tabs through and then fold them over to retain the seat but there just isn't enough room to bend them with the tank in position.
I also fitted 4 new screws through the tabs at the base of the seat back. This is unreasonably awkward as the tabs are so short that the screws are recessed underneath the seat back itself. Surely it would have been no problem to make the brackets a little longer so you could screw them easily into the seat well where they will be covered by the cushion anyway!
 |
| Seat belt shoulder emerging through bezel |
You can then replace the seat cushions- bending them to engage the tabs with their brackets underneath. I replaced all the missing screws in the kick panels and in the bottom brackets, thus fixing them to the bulkhead and the floor. Its then just a case of refitting the carpets and cleaning up and the interior is done!
 |
| Rear belts installed. |
Under the car remember to under seal the shelf brackets and remove any wooden blocks!
 |
| Brackets treated with under seal to protect against road spray. |
Overall this job isn't too bad- although its tricky for a 6-footer to get into all the places you need to get. As an aside I think it would be nice if the Securon belts had come with a stowage bracket to keep them tidy when not in use and I may see if such a thing is available as an "extra".


Well done Mike, I only needed the section about removing the rear seats. For me this was for upholstery work as I already have rear seat belts. All very clear and saved me a lot of time trying to work out what to do next.
ReplyDeleteThe only comment I would make is to say that to release the seat top from the parcel shelf, the three metal tabs that slip through slots in the parcel shelf are found behind the tank divider panel inside the boot although you mention this when reassembling. Anyway thanks for this article