However, this situation isn't great, and even though I don't intend to use these points for their intended purpose, I don't like damaged GFRP potentially admitting road muck into the box sections of the car and anyway; if they are supposed to be there, then for originality they should still be there- OK a bit OCD I know.
My front jack points are the best preserved. Front left is intact and I don't need to do anything to it. Front right has a missing plate but there is no damage to the body. The outline of the missing plate is preserved in the adhesive.
 |
| Front RHS jacking point |
The pop rivets aren't visible though. I cleaned off the old adhesive with a sharp chisel. This restored the under body profile and revealed the remnants of the pop rivets.
 |
| Adhesive removed, rivet heads visible |
 |
| Pop rivets drilled out |
 |
| Bung displaced-thickness of the body material is visible |
Whilst the red plug was out I compared it with a new one and its apparent that it has been trimmed to provide a flush surface against the underbody.
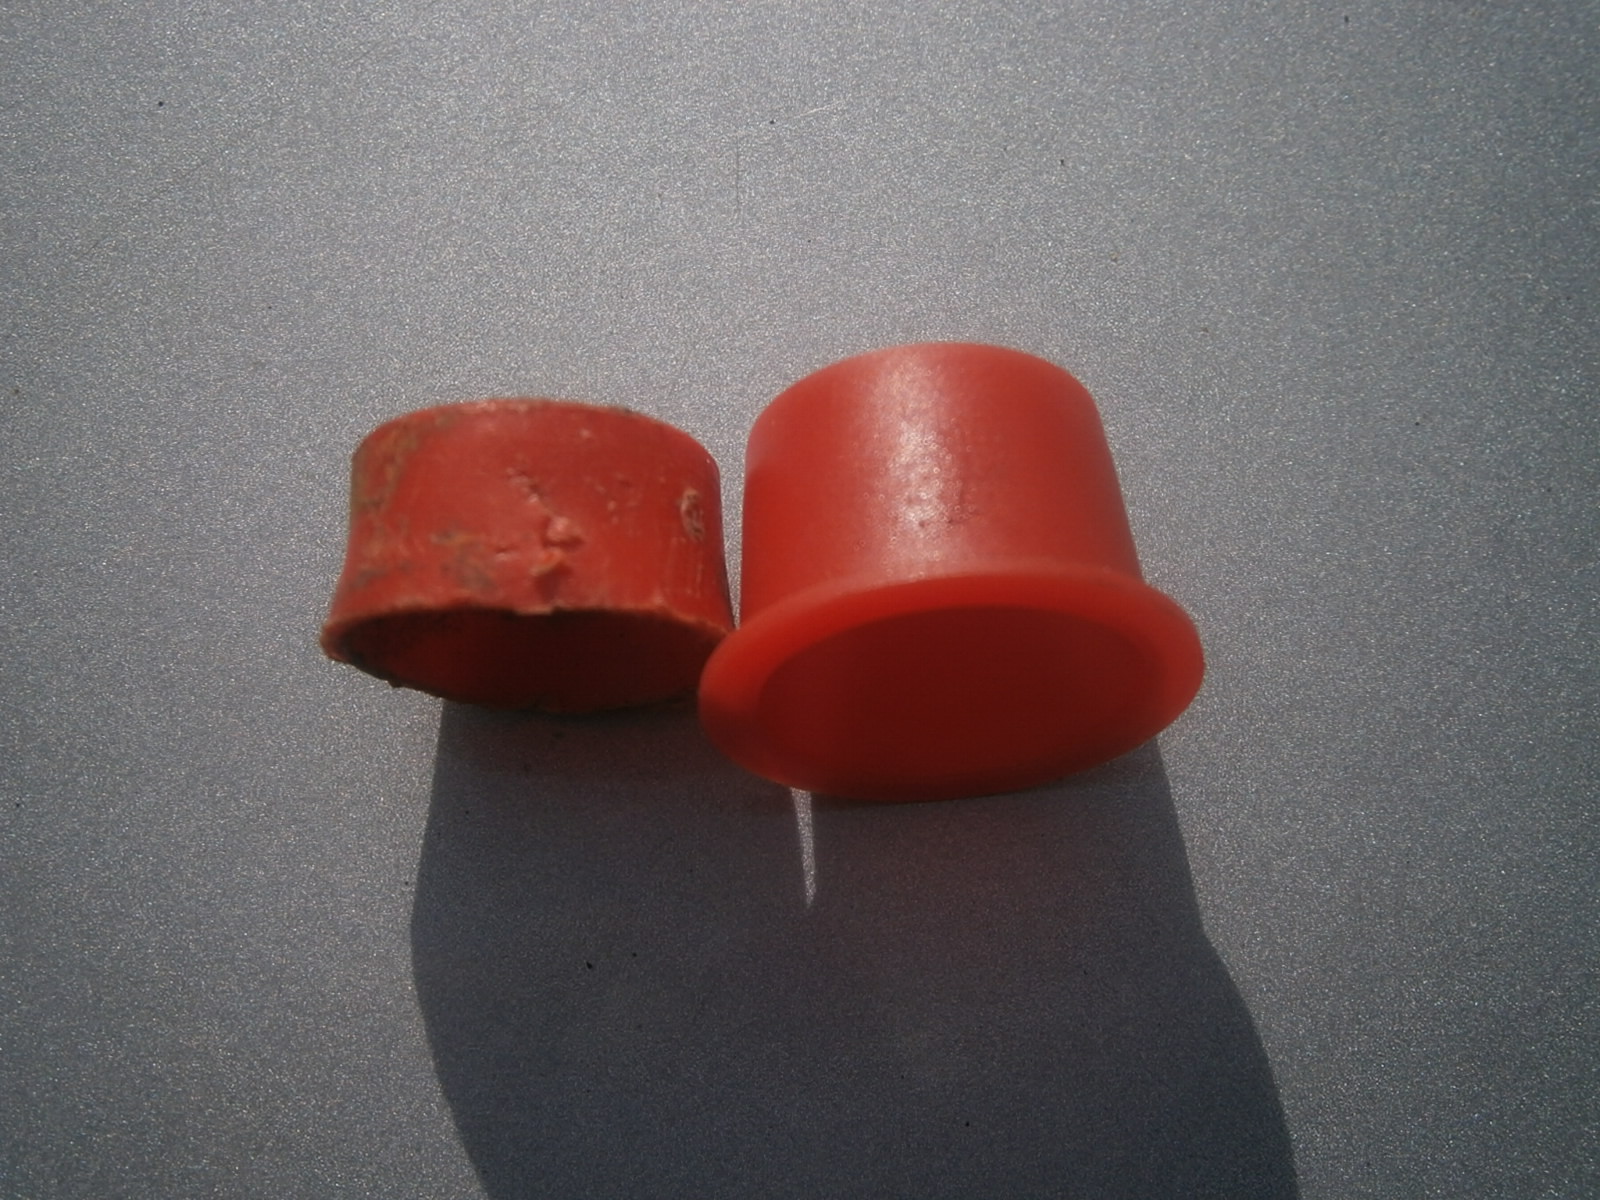 |
| Old bung left- new bung right, obviously the old bung was trimmed to fit flush. |
The LHS rear point is similar in condition and this plus the front points should repair perfectly. I expect them to be as functional as 40 year old jacking points could be expected to be even though I won't use them.
All the new jack plates were treated with Metal Morphosis rust converter/preventer and then sprayed in zinc primer and black paint.
 |
| Chemical treatment of new jack plates. |
 |
| Zinc primer before black satin top coat |
 |
| Rear LHS jacking plate fitted |
This gives me 3 pretty much original plates.
However, the rear RHS point was more badly damaged. Its clear that at some point someone has used an un-shielded trolley jack directly on the body here and the round cup of the jack has broken up the body material.
 |
| RHS rear jack point. The position of the pad is again outlined in old adhesive but the round scar left by the trolley jack is clear. |
 |
| Adhesive cleaned off |
The foam itself is not strong- it can be poked about with a fingernail, Strength is derived from its role in preventing the box section from flexing, the strength of the composite being greater than that of either component individually. At Lotus the body sections were made by the VARI vacuum assisted resin injection process. - Basically top and bottom of the moulds were coated with paint and gelcoat and allowed to harden. Random fibre glass matting was layered in and the foam block beams (pre-wrapped in unidirectional fibre matting) placed in position with more matting as needed. The mould was closed and resin/catalyst mix injected with a vacuum assist to help draw it in and around the matting and eliminate air bubbles.
However at the time my Excel was made, Lotus were also using the RRIM technique- certainly for the front bumper at least. This uses two reactive resins which are injected under pressure and simultaneously mixed in the mould. I find it difficult to tell the two materials apart, and although I think its unlikely Lotus re-tooled all the body moulds for RRIM I guess its possible. If the body is RRIM then I believe effective (structural) repair would be difficult if not impossible using GFRP alone.
The foam used by Lotus was polyurethane, and although its not the same stuff, builders expanding foam is also polyurethane and therefore should be chemically compatible. This foam also expands after spraying and this should allow it to fill any hidden cavities in inside the beam. I removed the plug and cleaned the cavity out. To prevent foam from also filling the bung hole I refitted a new plug wrapped in clingfilm to protect it from the sticky foam. I'm working on the basis that if ever anyone does wish to refit a plate in this position it will be fitted higher then the original owing to the new fibreglass and so a longer bung should be preferable.
 |
| Plug removed and cleaned out |

The next day the foam had cured well


The first point is that I had a problem with the instructions! U-Pol managers if you are reading this please credit your customers with some intelligence. The instructions say mix 10 ml of resin (nice precise value) with a "pea-sized lump of hardener.... PEA SIZED??? What sort of SI unit is that? ... And are we talking about petits pois or marrowfats??? ...Yes it makes one Hell of a difference because the volume of a sphere alters with the CUBE of its radius so this particular vegetable fixation actually covers an 8-fold range in the amount that might be specified!! So what do you mean??? If you mean X ml or Y grams for God's sake say so!!... Why is it 10ml of hardener and not a cocktail gherkin-sized amount??? ... And while I'm at it why not state the temperature at which the 30 min hardening time is derived. At least then I would stand a chance of getting something approaching a predictable setting time.
I have a fear of the stuff going off before I'm ready so I suspect I use too little hardener- and given that today is only about 14 deg C its bound to be slower anyway.
This is an inverted repair and so not the most accessible. I opted to lay up the sheets of matting on a clingfilm covered support. I wetted each thoroughly with mixed resin using a combination of brushing, rolling and immersion and assembled the pile of matting decreasing in size on the support. I wetted the area around the damage with mixed resin and was then able to apply the stack of soaked matting as a unit, bedding it into the resin on the body, persuading it into position with my hand beneath the cling film layer and easing the sides which I had cut as "wings" around the back and side of the sill.
It took two attempts, but I did get a repair that wrapped the end of the sill under the car and covered the jackpoint damage with good adhesion. This should keep the muck out. Gravity interfered again and I do have an unsightly bulge but at least its solid and rock hard... Sorry double entendres not intended. I will probably add a few extra sheets as I have a paranoia about strength in the body.
 |
| New fibreglass up to edge of sill |
 |
| ... and folded around the back and side of sill. |
Finally in order to avoid this sort if damage again I ordered so "Do not jack" stickers for the sills. I got these from Isaydingdong a seller on Ebay. They weren't listed as a ready-made product but they are very easily made, just find a font, size and layout you like and send them the details.

No comments:
Post a Comment
Feel free to let me know what you think of this blog. I'm working on my own here so any feedback from those Lotus enthusiasts floating around "Blogger Bank" is welcome. Suggestions for process improvements especially welcome. If you like it please follow.