I know I'm no trimmer... Actually I'm no sprayer either! Give me two bits that need to be bolted together to a specified torque and I'm happy... The artistic creative stuff eludes me! The trouble is that sort of work commands a high premium and I can't afford it so I have to settle for a lower standard. My blog will record this compromise, but if you can pay a professional then you probably should! I've already described how I fudged my way through seat repair and respray, but here I'm going to tackle the headlining and other obvious shortcomings in the trim.
The first of these is the trim above the dash and immediately in front of the windscreen. This piece of trim shrinks in the heat and often cracks. Luckily mine wasn't cracked but contraction had opened up obvious gaps at either end between the windscreen trim and the A pillars.
I used some closed cell foam I had left over from motorcycle saddle repair and I bought an offcut of leather of a pretty close blue colour for £1!
This is the gap on the driver's side. There is a similar one on the left. The trim is actually recessed at the base shown here by the way my fingers can slip down under the trim.
I cut a solid rectangle of foam and shaved one end to achieve a wedge shape that could slip under the trim.
I covered the trim in blue leather and stuck this down using carpet adhesive spray, covering the wedge end and flat end.
I could then feed the new plug of foam into the gap, slipping the sloping side under the windscreen trim and pushing the blunt end under the A pillar trim.
Not by any means perfect but not bad for a first try. I think I need to refine the shape and size as its too big and tends to crease up. However, this has shown that the approach can work.
I refined the shape ... largely by reducing the wide end until the plug fitted smoothly. From outside the car it looked fine. Inside the car the plug really needs a stitched seam in the leather to join the sharp edges of the A pillar trim and windscreen finished, but eventually the fit was OK. I will see about gluing down any loose ends especially the base of the A pillar trim which seems to have pulled away as the gap opened up.
Headlining and rail trims
I bought 4 m of foam backed headlining material from eBay. I've tried to match the original Lotus "old-vest grey" as closely as possible. I believed only 3m are needed so the extra metre is insurance. There are two excellent accounts of headlining replacement: the
first by Chris Wright uses conventional foam-backed headlining material with glue to stick it directly to the roof and rails. This was expanded at the
lotus forums-and would be a truly excellent resource except that all the pictures are missing! The
second approach- also at the lotus forums cannibalises a people carrier rigid headliner to bridge between the rails as a self-supporting liner. No glue is then needed on the roof but its still necessary to cover the various rails with glued fabric. As I've got the fabric and need to cover the rails anyway, I will try the glued fabric approach first.
... and while I'm talking about fabric this has been a learning process. Having removed the original lining I now know that it consisted of three layers, the outer coloured brushed nylon, a foam sandwich layer and a lower later of plain linen. This is I think called scrim backed foam headliner. In my case the foam layer has crumbled to dust allowing the top layer to sag and peel badly- hence the need for this particular job. The inner layer is still stuck fast to the bodywork. Removing this stuff is a pig if a job as the foam is now a fine black dust that goes everywhere and the scrim layer still grips like buggery to the body but all has to come off! I have already bought some fabric- foam backed its true, but it lacks the lower scrim layer and I'm worried it won't stick well. The manufacturers (Fortis Polster) assure me that it will so we will see.
The headlining needs to be fixed to 7 sections. The obvious two are the large flat roof panels forward and aft of the roll bar. The front section measure 49x105cm and the rear 41x107 cm (rail to rail- the actual sections needed will need to be a few cms oversize).
 |
| Front and rear major roof panels visible here with roll bar cover separating them |
In addition there is the front header rail (incorporating sun visors... although I wont be covering these), the rollbar covering itself (crosses the car midway),
 |
| Front header rail with sunvisors |
 |
| roll bar cover mid car |
... the 2 rear cant rails (up and around each window in the rear quarters)
 |
| LHS Cant rail |
 |
| RHS Cant rail |
... and in my car a trimmed rear header rail running across the car above the rear windscreen.
 |
| Rear header rail above rear windscreen |
This last was discontinued in 85, and has been removed even from some earlier cars. This seems a shame since it makes an easy edge to the roof where it joins the rear windscreen. Without it
some accounts show that getting a neat edge here can be problematic.
Removing the interior rails
I have
already described the removal of the front header rail and this was removed in exactly the same way once more.
Removing the roll bar cover
The rear interior light is removed by squeezing the side tab and pulling the light forwards. Disconnect the wires to remove the light. Looking inside the roll bar cover there is a rusty bracket secured with a single self tapping screw.
 |
| Rusty bracket and screw inside roll bar cover seen through light opening |
The roll bar cover is held by this single screw and by interlocking its ends with the tops of the B pillars. To remove it you need more room so the B pillars have to be released enough to flex a little. This means removing the seat belt top mounts and the coat hooks.
 |
| Upper seat belt cover- the cap just lifts up |
 |
| ... and off. |
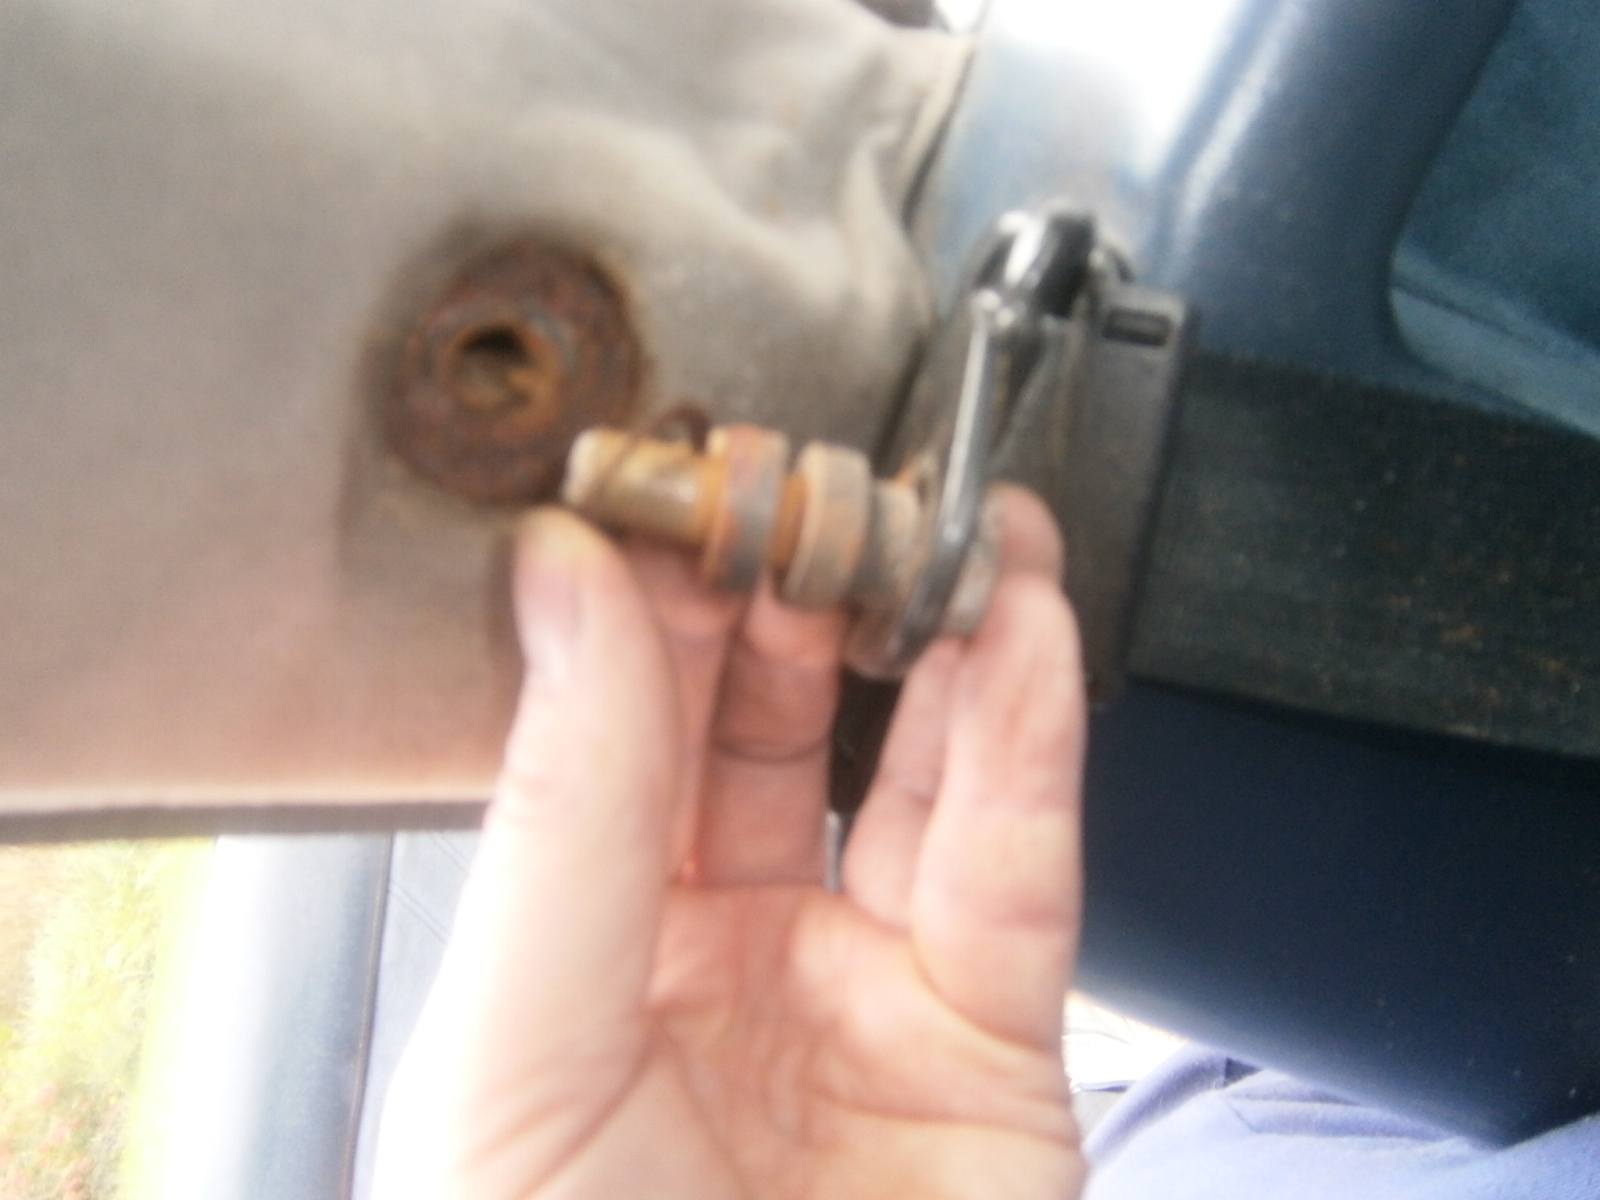
The bolt beneath is an 11/16 AF fitting and unscrews to release the mounting. There are a number of fittings on this mounting.

The picture below shows the fittings. Immediately beneath the bolt head is a small slim washer, Penetrating the belt hasp is a shaped spacer with a plain spacer behind, then behind that is the larger slim washer and finally a large thick washer (in this case very rusty and still stuck to the fabric of the B pillar)

 |
| washer levered off. |
The other side was fitted slightly differently with the larger slim washer immediately below the seat-belt hasp and above the wider part of the shaped spacer.
I suspect that this is the correct fitment but I need to check. One piece of advice is to clip a peg or something over the belt once its free as the shoulder fastening hasp does fit through the slot on the rear quarter and if it vanishes down there its a pig to recover... Don't ask how I know!
The coat hooks are simply a plastic cover that pulls up and off the metal bracket beneath.
 |
| B Pillar coat hook |
 |
| Coat hook cover pulls off upwards revealing the metal bracket beneath. |
The bracket is secured with a single self tapping screw which removed easily releasing the bracket.
 |
| Coat hook bracket removed. |
The roll bar cover has these nasty wire grill vents in it. Rusty in my case and looking really tacky
 |
| "Mr Chapman- shall we commission some nice plastic loeuvres for the internal vents in our luxury car market-leading Excel?... No?? Oh well I'll just use some off-cuts of chicken wire then." |
By bending the B pillar inwards you can get enough room to finagle the roll bar trim off and out. I found it went best if fiddled out towards the rear.
 |
| Roll bar cover coming out. |
Roll bar cover removed- remnants of foam powder visible
Bracket that holds the roll bar seen inside, pop rivetted to the cover but quite rusty.
 |
| Roll bar cover retaining bracket inside cover. |
The nasty wire grills are just stuck to the trim where its folded over the edge of the roll bar cover- they pull off very easily- I wire brushed them and treated them with rust stabiliser before repainting.m
 |
| Wire mesh grills in roll bar cover- one folded up the other still stuck in position. |
 |
| Wire mesh grills removed. |
Once the cover was off the roll bar could be seen- some superficial rusting visible. Again I removed any flaky material and treated with rust converter.
 |
| Roll bar passing behind the B pillar trim. |
 |
| Wire grills rescued and resprayed. |
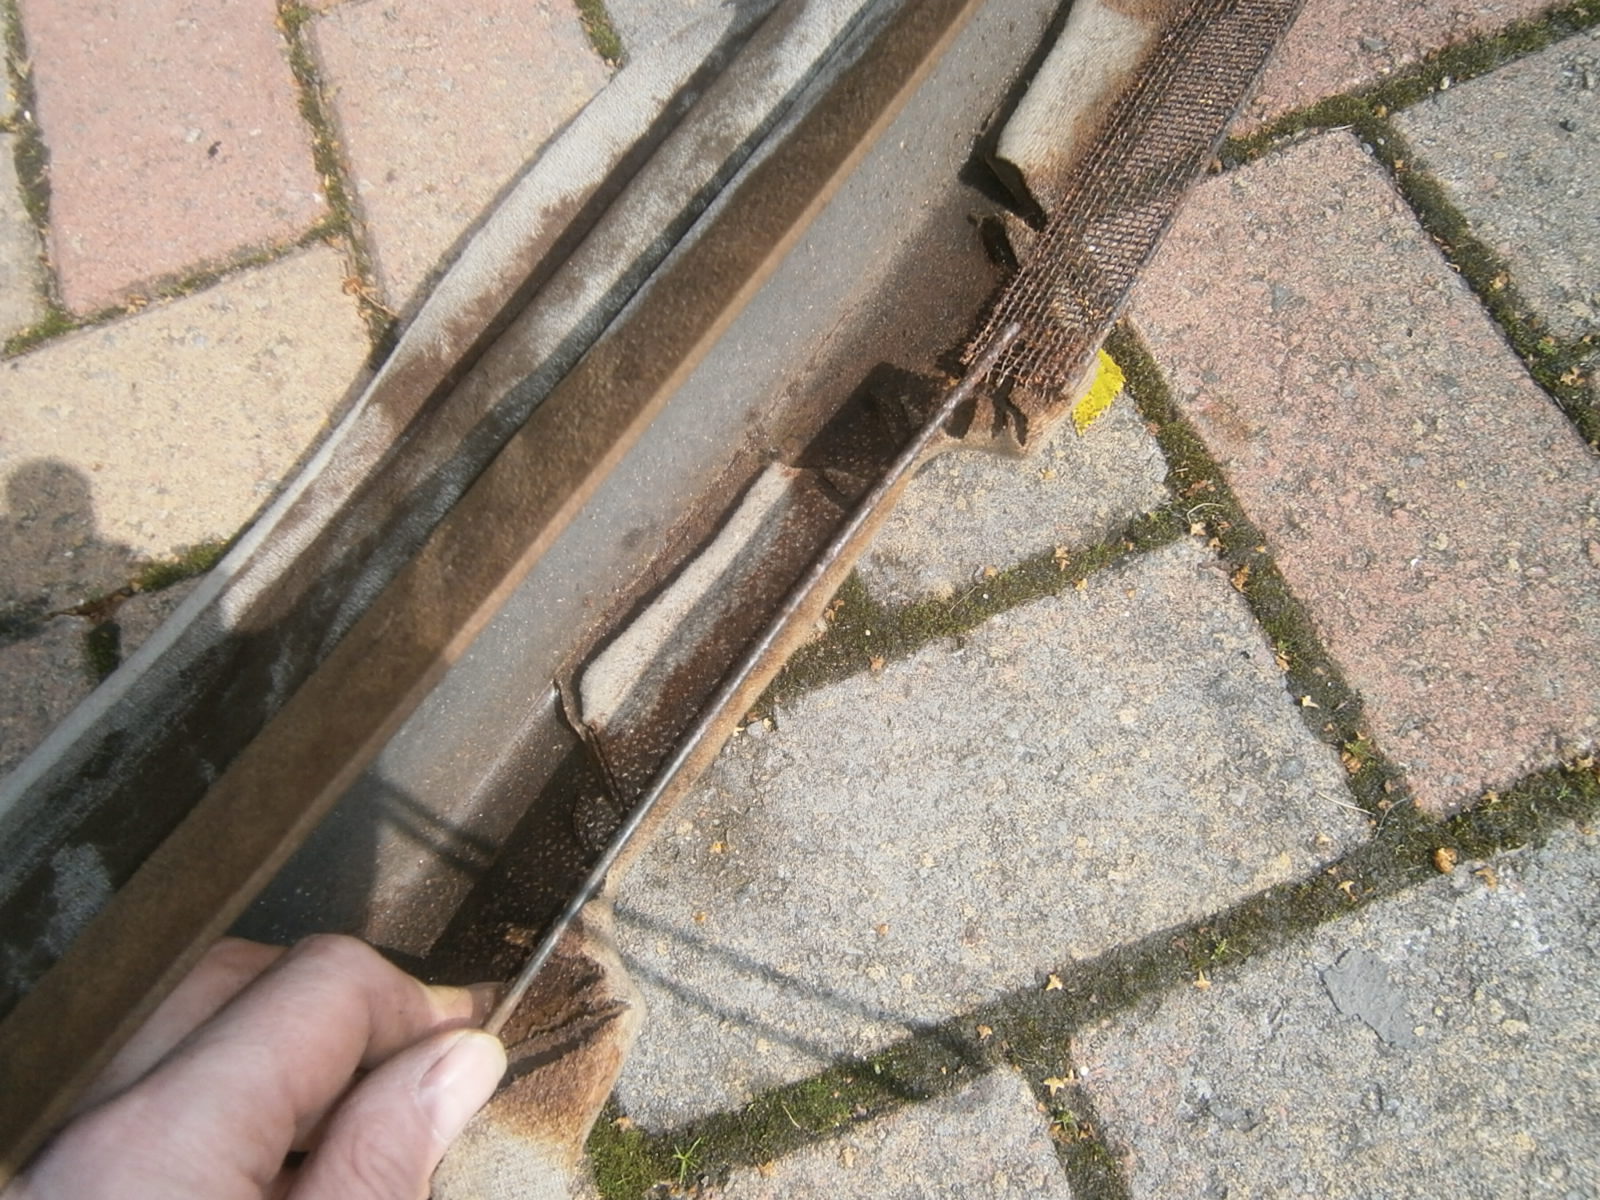
Rear Header rail
The rear header rail is simply spot fixed using 4 of the "stickle brick" fasteners onto a stiffener which is attached to the top of the rear screen. The header cover just pulls off the interference connectors.
 |
| Rear header rail pulled down from stiffener... |
 |
| ... leaving the stiffener in position- again very rusty. |
Rear Cant rails
The cant rails are held by a pop-clip into a bracket fixed to the rear quarter. It can be released from the roll bar end, but it will need a bit more room at the back. The rear seat cushion can be pulled forwards to permit this. The cushion is held back by three metal tabs that penetrate the rear shelf/bulkhead and are folded back. These are accessed from behind the boot trim panel, but in my case they were loose already and the rear seatback just pulled forwards anyway.
 |
| One of the seat tabs behind rear seat cushion and the slot in parcel shelf into which it fits. |
 |
| Pulling rear seat back forward. |
The front of the rear cant rail can then be pulled down from the roll bar end and the the pop fastening unclipped.
 |
| Disconnecting the cant rail from the roll bar cover and pop fastener. The bracket is seen attached to the rear quarter and the corresponding clip attached to a hole in the cant rail |
... before the cant rail is pulled forwards and out above the rear seat.
 |
| Rear cant rail coming off- note pop fitting clip on underside and metal bracket with locating hole still attached to the rear quarter |
I cleaned up the loose rust on all the rusty fittings- coat hooks, belt fasteners, the roll bar bracket and as shown here on the stiffener, and treated everything with rust stabiliser.
B Pillars
Removing the roll bar cover and cant rails leaves the B pillars still trimmed. These are supplied by Lotus as part of a complete rear quarter panel and ready-trimmed. In some cars the B pillar is trimmed to match the seat trim. This would be great as it would mean that it wouldn't need any attention when the roof-lining is changed. Sadly in my case its trimmed as part of the roof. This means it has to be changed if the headlining is changed- drat! Its also a very tricky thing to do when the panel is fitted to the car as access is very limited. As this part was trimmed off the car, access must have been wonderful, and the B Pillar trim is well secured to the quarter panel trim proper with glue or stitching. In my case at least it wasn't stitched, but sealed well with glue.
The B pillar has to be flexed in order to remove the roll bar cover so there is some movement which can allow re-trimming. However, its a naturally weak point because its immediately adjacent to the slot for the seat belt which acts as a natural perforation. In my case the dead hand of the LBPO struck again; I'm sure someone had been here before me since the seatbelt securing nut was loose and the washers in the incorrect order on the mounting. Sadly I found the RHS B pillar had snapped mostly from its junction with the quarter panel proper.
 |
| B pillar trimmed in headlining material |
 |
| Base of RHS B pillar- cracked and detached from the rear quarter panel proper. The end of the pllar trim has been pulled up to show the crack at the junction. |
This did concern me- but in the end this is only trim and has no structural role. It will be secured again by the seat-belt hasp and coat-hook screws. I was able to remove the headlining trim from the B pillar and will have to explore methods of recovering and sealing the trim to that of the quarter panel below. If all else fails I can remove the whole quarter panel and either replace it or repair it with GRFP laminations to the rear... provided I can do so without obstructing the seat-belt.
Having removed the trim from the B pillars- this completed the interior strip. The car now looks terribe but at least it feels healthier now the shabby old stuff is out.
 |
| Rear view- all covers removed. |
 |
| Centre section of cleared roof |
 |
| Front roof panel |
 |
| B Pillar un-trimmed. |
This completes the strip.


No comments:
Post a Comment
Feel free to let me know what you think of this blog. I'm working on my own here so any feedback from those Lotus enthusiasts floating around "Blogger Bank" is welcome. Suggestions for process improvements especially welcome. If you like it please follow.